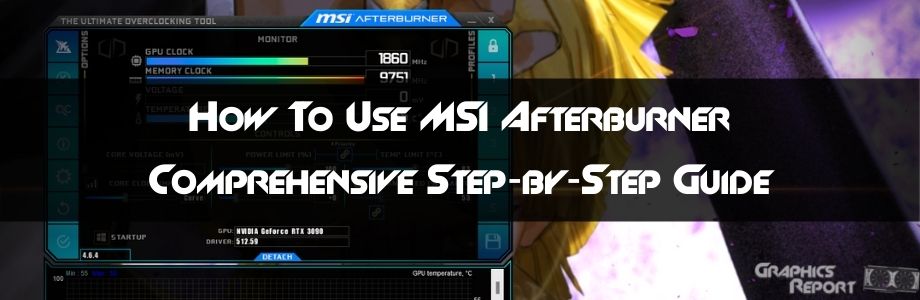
There is no way to overlook the fact that MSI Afterburner is perhaps the best software that you can use to tweak your graphics card. Sure, almost every GPU AIB have its own version of the software, but nothing works as good as MSI Afterburner.
That can further be solidified by looking at the fact that it has become the staple for anyone who is looking for a great overall experience when it comes to tweaking the GPU settings.
However, a lot of people are still wondering about how to use MSI Afterburner because, at first glance, the software does look confusing, and well, you can easily get lost in the mix, and that is not what we want for anyone, right?
Therefore, in this guide, I have decided to take a look at how you can use MSI Afterburner as it will help you make sure that you are not getting into something that is confusing, at best.
What Does MSI Afterburner Do?
Now, it does not take a genius to figure out what MSI Afterburner does, but for anyone who is wondering about it, the software is simple to use, and it is used to control the GPU and various aspects related to it, such as the power limit, fan speed, and more.
#1- Overclocking tools
Considering how GPU overclocking is something that has become a norm over the past couple of years, it is only safe to say that the need for tools that are good at overclocking is significant.
Thankfully, MSI Afterburner has been the go-to for as long as one can remember, and for anyone who is looking for a good, solid tool that can provide some really good overclocking, this is the way to go and something that you should definitely not overlook in terms of the usability. Sure, there is a learning curve, but once you master it, the software is really handy.
Related guide: A guide to underclocking a GPU
#2- OC Scanner One-Click Overclocking
Another feature that I really love about MSI Afterburner is the OC Scanner, and yes, it does what it sounds like. The scanner is responsible for gathering data and trying to see if it can actually use it to overclock the GPU to the best possible settings.
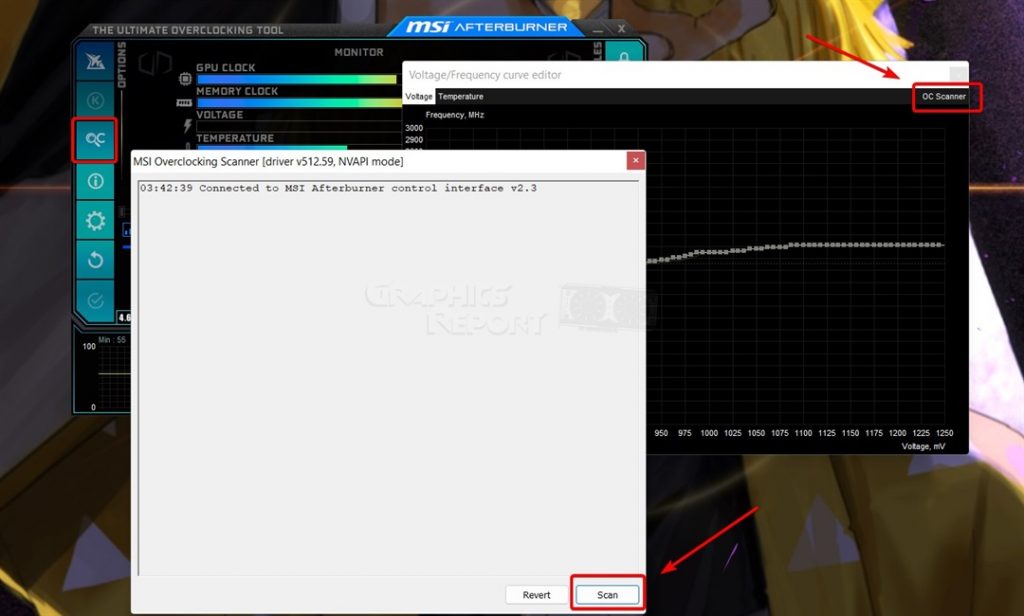
Sounds scary, I know, but this is so much more convenient than manually doing all of the overclocking because here, you really do not have to worry about something that could go wrong.
#3- On-Screen Display (In-Game FPS Counter)
One of the main reasons why I have been using the MSI Afterburner for as long as I can remember is the OSD or on-screen display.
In a world where most tools stop working for one reason or another, the OSD on MSI Afterburner has remained the most consistent, and while it has run into issues in the past with compatibility, it was never something that stopped working altogether.
The OSD allows you to monitor frames per second, temperature, power usage, and GPU usage, in general. It is up to you to decide what needs to be monitored or not.
Suggested reading: Increase your FPS in AAA games
#4- Hardware Monitor
If you are wondering that your GPU might not be performing the way it is supposed to perform, there is a chance that you need to troubleshoot it before you can actually go ahead and come to a conclusion.
Thankfully, MSI Afterburner has been excellent when it comes to allowing you to monitor the hardware and make sure that everything is running the way it is supposed to run. It can be surely complicated, but if you are doing it right, you will not have any issues.
#5- Custom Fan Profiles
Next up, let’s take a look at the custom fan profiles, which have also become a very nice staple in MSI Afterburner. You see, fan profiles are not always needed because almost all the modern-day GPUs that we get the chance to look at are excellent in the way they perform thermally and acoustically.
However, every now and then, we encounter a GPU that has a horrible fan curve, and it cannot keep the temperatures in check. If you are dealing with something like that, making your own fan profiles in MSI Afterburner is one way to go about it, as it will only make the whole experience infinitely better.
#6- Video Capture
Another great use for MSI Afterburner comes from the fact that the software is excellent for video capture and while a lot of us are known for using various offerings, if you want something that just works really well overall, then going this route is not at all a bad thing.
The software is simple to use, it is convenient and allows for easier capturing without running into too many problems or any problems, for that matter.
Recommended reading: How to check if your graphics card is dying?
Where To Download MSI Afterburner?
Now, for those concerned about MSI Afterburner and where to download it, the process itself is not at all difficult. As a matter of fact, downloading it is one of the easiest, so you are good to go if you just follow the instructions.
Still, for those interested, you can simply download MSI Afterburner from the official MSI website. However, if, for some reason, the website is not working, you can also go to a 3rd party website like Guru3D and download the software from there.
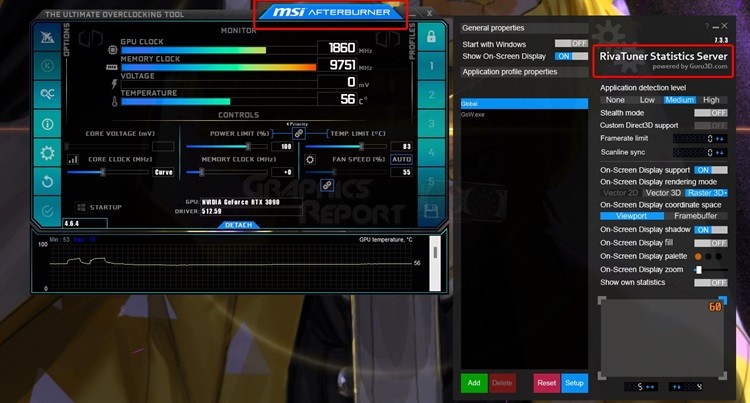
Once it is downloaded, you just have to go ahead and start using it, and it will work just fine. One thing that I would remind you is that when you are installing MSI Afterburner, there is going to be another piece of software called “Rivatuner Statistics.” Let that install, as well, since that is the one responsible for handling OSD, statistics, and monitoring.
First Settings For Your MSI Afterburner?
Ideally, when you are done downloading and installing the MSI Afterburner, you should just go ahead and start running it without any issues. The software will run itself when the Windows boot up and stays in the background until you close it yourself.
Needless to say, the whole process of using MSI Afterburner is safe to say. However, for those who are wondering or are bitten by the curiosity bug, the landing page for MSI Afterburner gives you the current state of your GPU, such as the clock speed, the memory speed, and the voltage, as well as the temperature.

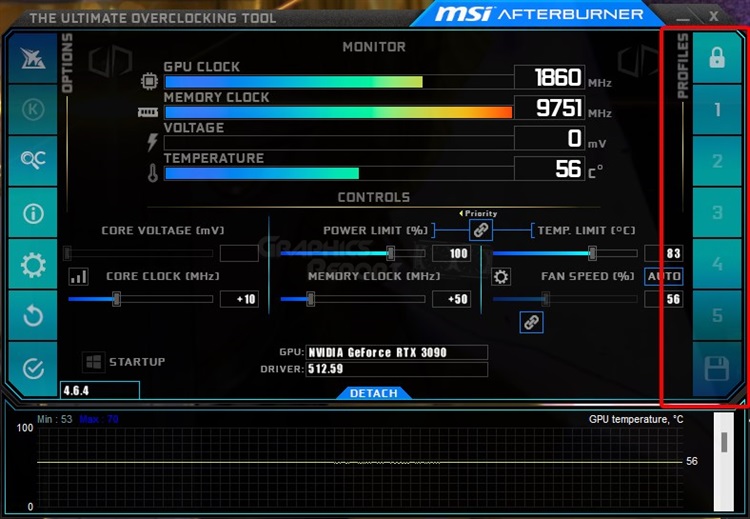
Under all of that, you get the manual controls where you can set the voltage, clock, and fan. On the right side, you have the option to set profiles, and on the left side, you get other settings that can help you with the overall experience.
At first glance, it might look overwhelming, but if you are under the impression that it is not something that you want to tinker with, that is perfectly fine, and you can leave the settings as they are.
Related guide: How long do graphic cards last?
How To Overclock Your GPU With MSI Afterburner?
Moving onto perhaps the one step that is the most complicated for anyone who is going to use MSI Afterburner, and that is the process of overclocking.
Now, this is something that most people are often confused about, and I will be honest, the first time I ended up overclocking my GPU, things did not go as planned.
However, over the past couple of years, I have learned the key to overclocking the GPU, and things have worked out really well.
Now let’s take a look at some steps that will help you overclock the GPU with MSI Afterburner.
- Setting Up a Software: The first step requires you to go ahead and setup a software that is going to be used for taking readings. You could go ahead and use a graphically demanding game like Metro Exodus Enhanced Edition or Red Dead Redemption 2 or a stress test software like Furmark or something along the lines.
- Establishing a Baseline: The second step requires you to establish a baseline that essentially allows you to be sure that you are getting the right temperatures as well as the framerate in your games. The reason why it is important to establish the baseline is that it will help you determine whether or not your overclock is effective.
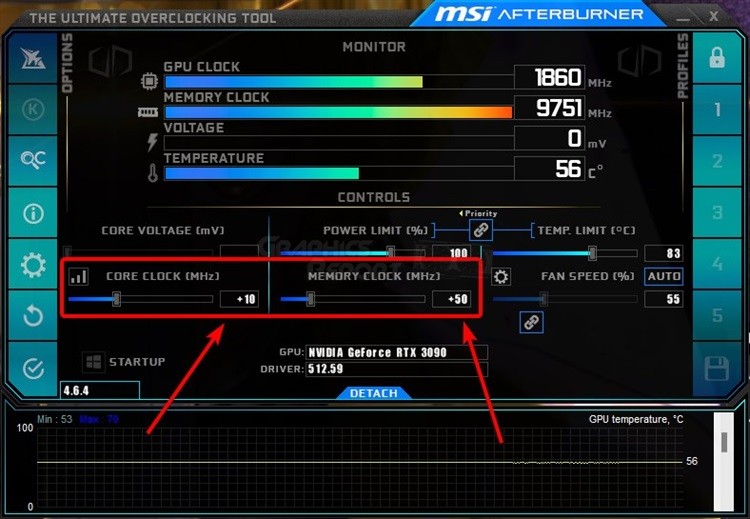
- Tuning the Settings: Once you are done establishing the baseline, the next step is to tune in the settings and see how things work. In MSI Afterburner, you will see “Core Clock” and “Memory Clock” sliders. I would suggest that you increase the “core clock slider by increments of 10” and the “memory clock slider by increments of 50.” Then run the software you set up in the first step and compare the scores that you are getting with the scores that you recorded beforehand. If you see an improvement, that’s good. However, if you do not, repeat the step of increasing the core and memory clock again.
- Be on the Lookout for Artifacts: One of the most common issues that happen when the overclocking is unstable is that you start seeing graphical artifacts on the screen. When you are overlocking, this needs to be checked and looked into because a graphical artifact means an unstable overclock, and we do not want that. So, be sure that you are checking it.
- Saving the Settings: Not all GPUs are created equally. This means that there is a chance that you might increase your GPU’s performance with ease using aggressive overclock, and at the same time, you might fail to do so entirely. However, once you have found the perfect settings, you can go ahead and save them.

- Adjusting the Voltage and Power Limit (Optional): This is optional and for advanced users only, but adjusting the voltage allows you to send more power to the GPU, and increasing the power limit allows your GPU to use more power. Be sure that you are fully aware of these settings because if you end up increasing everything to a dangerous level, you can easily fry your GPU, and we do not want that.
In most cases, overclocking is a process of trial and error, and we have to be certain of what we are doing with it so we can get the perfect overclock with ease.
How To Use MSI Afterburner To Show FPS?
Another great thing about MSI Afterburner is that you can use it to show FPS in games, too. In the past, the support was limited at best, but the recent versions support almost every game. In order to do that, just follow the steps below, and you are good to go.
- Open MSI Afterburner and go to Settings.
- Once there, look for a tab called “Monitoring.”
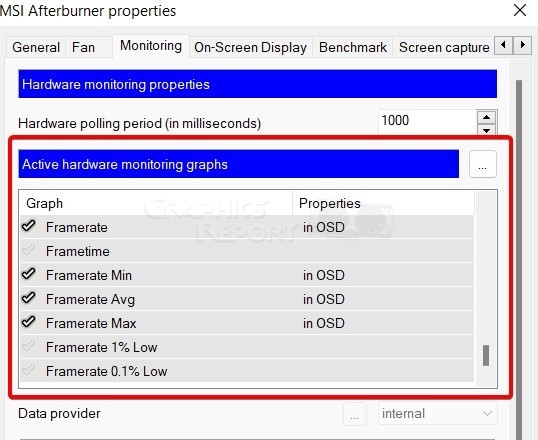
- Now, you have to look for “Framerate” under the Active hardware monitoring graphs and click on the left side of it to add a checkmark.
- Look for “Framerate graph properties” and then tick the “Show in On-Screen Display.” Make changes to the other settings and hit Ok.
The next time you will launch the game, the framerate will start showing on the game. However, you have to remember that you will also need the “Rivatuner Statistics installed” for this to work, or it will not. Through this process, you can add other options such as temperature, GPU usage, frame time, and more.
How To Set A Fan Profile?
Setting a fan profile is something that not many people will have to go through because, in most cases, you are not going to run into the issues with the fan curve or the temperature of your GPU, for that matter. Still, if this is something that you want to do, then the process is easy.
- Open the “Settings” on your MSI Afterburner.
- Once there, look for a tab labeled “Fan” and then select “Enable user-defined software automatic fan control.”
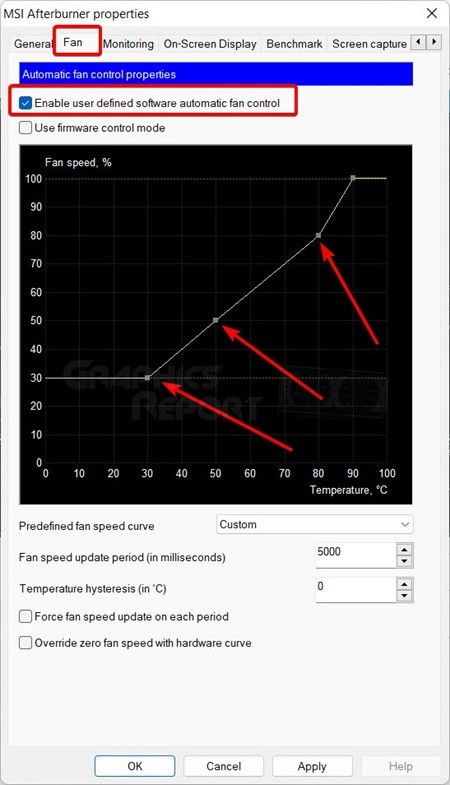
- Once you enable it, you will see a graph that will allow you to set the custom fan profile with ease and make a curve, as well.
- Now simply handle the graph and raise or decrease the values as per your preference. Hit apply and then hit Ok.
Remember, if you are familiar with setting the fan curve, only then should you go ahead and do that because otherwise, things can get complicated, and you might end up running into issues.
Is MSI Afterburner Safe To Use?
By default, there is nothing about MSI Afterburner that would raise red flags. The software has always been easy to use and straightforward. However, a lot of times, people run into issues and get confused because they are not certain about how something needs to be used.
Yes, MSI Afterburner is completely safe to use. However, if you are looking to go ahead and tinker with the settings, be sure that you fully know about it so you can go ahead and know that you are not doing anything wrong.
MSI Afterburner does have a lot of settings that can make things worse for you, so it is always better to keep things in mind before you try it out.
More guides:
How to clean a GPU easily
Fixed: unable to connect to Nvidia?
Fixed: “Nvidia control panel not opening.”
Fixed: GeForce experience something went wrong
Fixed: Nvidia control panel missing in windows
Fixed: you are not currently using a display attached to an Nvidia GPU
My Final Thoughts On It!
We all can agree on the fact that MSI Afterburner is one of the best tools that you can use for monitoring your GPU and making tweaks. However, in the wrong hands, the software can be an absolute disaster, and you can end up creating more damage than actually solving it.
Therefore, it is advised that you are only using the software if you are fully aware of how to use it. If you only want to use it for the sake of monitoring, then that is also a fine choice considering the amount of control this software gives to you but if you do want to overclock, be sure that you are fully aware of all the nooks and crannies, as well as the technicalities that are associated with the software.