It’s a universal notion in the world of PCs that frames per second (FPS) matter more in games than resolution. Sure, Red Dead Redemption 2 would look crisp on your brand new 4K HDR monitor but, would it really even matter if all you were getting were 20FPS?
A bad frame count can throw you off and spoil your entire play session. It especially hurts when you know your rig can handle all the frames, but there’s something that’s stopping it from achieving its full potential.
Boosting your frame rate can make the game feel smoother and may even make you play better under intense scenarios. Because let’s be real, the last thing you’d want is for your frames to drop when you’re in a game-winning 1v1.
The following guide aims to provide you with solutions to all of your low FPS issues that ruin your gaming experience.
What Does FPS Mean?
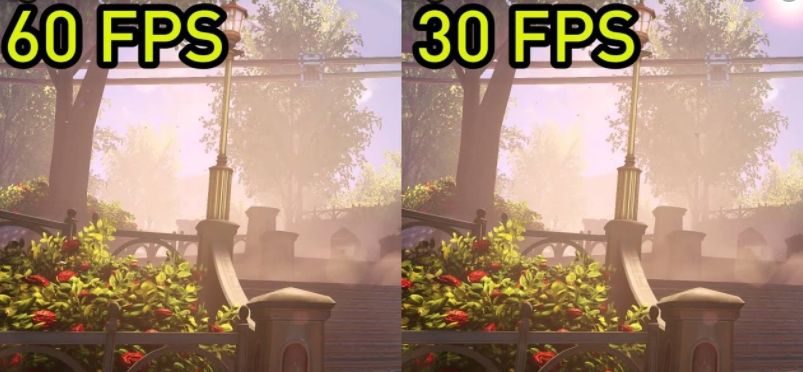
In simple terms, the images that are rendered consecutively on your screen every single second are your FPS, an available image being a single “frame.”
The human eye can see up to 12 separate photos simultaneously, meaning that if you stitch 12 pictures together and go through them instantaneously, your brain will perceive it as a video. It would look very choppy, but that’s what the baseline frequency is.
For games specifically, the amount of frames that your graphics card is rendering and displaying out every second is your FPS. And this frame count will always vary no matter what. Even if you own a $10,000 Threadripper PC, or a crappy one from 2010.
This number can range between 30 to upwards of 500 (yes, you read that right). While consoles strive to deliver a stable 30FPS (in some cases 60) experience, PCs can provide much more than that.
And one of the many beauties of custom PCs is that you can have more FPS if you spend more money. Essentially, PCs offer you a directly proportional “frame per dollar” apparatus.
Your framerate is also linked to the “refresh rate” of your monitor/TV. Your screen can only display a certain amount of frames per second, regardless of your computer’s capabilities, and that is the refresh rate of your monitor.
For example, if you have a 60hz monitor, then anything over 60FPS would not make a difference to you, simply because your display won’t be able to take advantage of those extra frames. For this reason, high refresh rate monitors are top-rated for gaming.
Low, Unstable, Or Capped FPS, And Why Do They Happen?
Imagine you’re playing Fall Guys, you’re having a great time because it is running smoothly without any hiccups, you reach the final level, and suddenly, it akes a huge dip, and everything starts feeling off; you are experiencing a drop in your frames. Sometimes, frame drops are not linked to an issue but rather just part of the 1% low that is pretty normal.
But if your game is continually fluctuating between, let’s say, 144 – 30 frames, and it feels jarring to play at this time, you are facing unstable frames.
While a varying frame rate is usually not a bad thing and is actually utilized to properly manage CPU+GPU resources if it starts jumping like crazy and negatively affects your experience, then rests assured, there is a severe problem in the mix.
Occasionally, you’d wanna “cap” your FPS to avoid the above-mentioned instability in frames. A capped frame rate is basically like gaming on a console; the frame rate stays the same almost all the time with a few drops here and there. Capping applies a limit to the max number of frames the GPU would be allowed to render and display.
The number 1 reason for frame drops, stutters, or fluctuation is resource deficiency, meaning that your computer just isn’t powerful enough to render and/or maintain those frames.
However, it’s seldom the actual optimization of the game that you’re playing that’s continuously causing your FPS to drop or stay low or just go haywire.
Because of PCs’ nature and how they’re built, it’s quite tricky to make a game compatible with all kinds of custom PC hardware. GPU drivers need to be kept updated to avoid any bugs or performance issues, and you also need to customize your settings accordingly.
You may also be facing some bottlenecking problems that are disabling you from maximizing your hardware potential.
How To Increase FPS In Games: 11 Ways To Boost Your Frame Rate
Before shelling out for a new GPU, you should try out the following tips to increase your FPS in PC games. Let’s discuss how we can potentially solve all of the aforementioned problems, and then some, that will allow you to boost your frame count. Here are the 11 ways on how to increase fps:
1- Update Your Drivers.
Drivers exist for pretty much everything in the PC world. They allow for proper communication between all the parts of your computer. Thus, it’s imperative to keep your drivers updated at all times. To steer
clear of any performance issues, bugs, or security concerns, GPU manufacturers regularly update their drivers.
There are 3 graphics manufacturers in the world right now: Intel, AMD, and Nvidia. All of them have proper software that can be utilized to update the graphics drivers automatically.
Intel has the Intel Driver & Support Assistant,
AMD has the Radeon Pro Software (Adrenalin Edition),
Nvidia has the GeForce Experience.
If manually downloading and updating the drivers is your cup of tea, then you can go to the GPU manufacturer’s website, make sure to not go to the brand’s website like Asus, EVGA, or Zotac, and download the drivers manually, follow the guidelines given on the website, and install them.
However, sometimes updates to drivers actually cause something to break down or not function like before. This usually happens when a game itself isn’t updated to commandeer for those updated drivers and causes a clash between the GPU and the game.
In cases like these, all you need is to simply roll back your drivers to the previous update, or delete them altogether and just download the specific version you want from the GPU maker’s website.
How to find out what GPU you have.
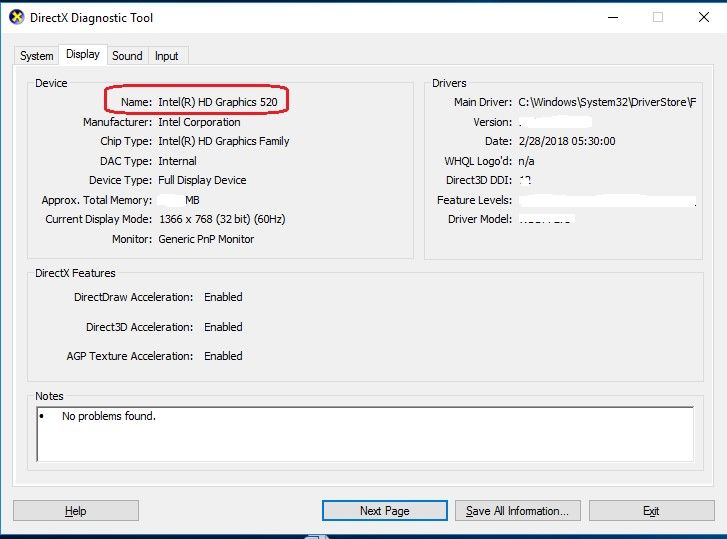
Before doing anything, you will first need to know who’s graphics you are running on your computer. To find this out, simply press Windows + R on your keyboard and then type “dxdiag” and press run. This will open up the DirectX diagnostics tool, which allows you to inspect almost each and every single component in your PC.
From there, head over to the “Display” tab, and right there under the name of your graphics chip, you’ll see the respected manufacturer. All you have to do is follow the steps mentioned above to update your drivers and quickly increase your frames.
Note: Always restart your PC after updating your drivers. And make sure you are running on the latest version of both Windows and your game.
2- Adjust Your Game Settings.
Updating your drivers will definitely give you a noticeable FPS boost, but you can only get so far with just getting the latest drivers installed. Sometimes, your computer just isn’t beefy enough to manage all those frames at the same time.
You will have to adjust the in-game settings to achieve the desired frame count you want in those cases. It’s usually the right balance between speed and efficiency or quality and performance.
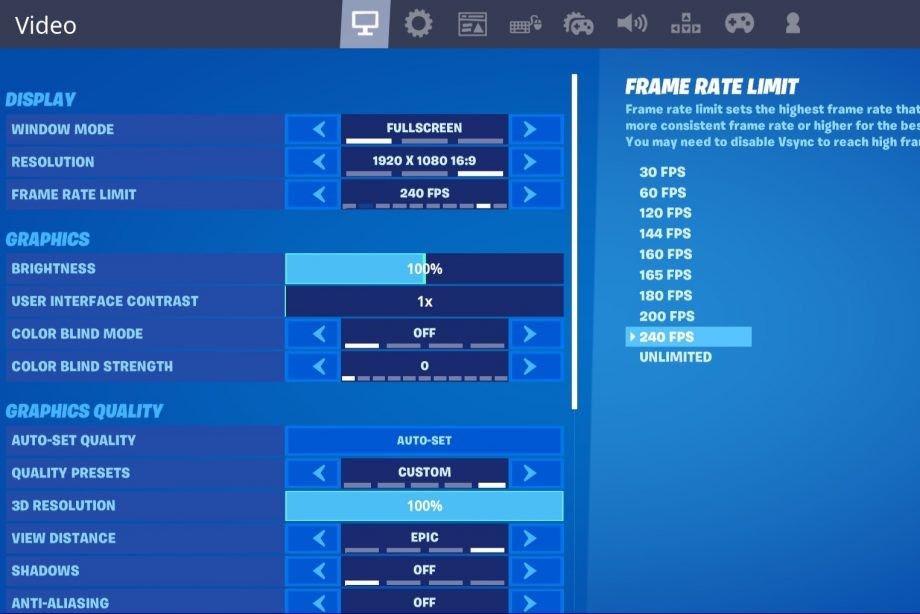
All modern games have a graphics quality preset built-in. Usually, it starts from the lowest and goes up to “Ultra,” which is the highest visual fidelity you can get.
Turning down the graphics quality and/or disabling some resource-heavy settings will enable your GPU to breathe more freely, allowing for a better frame rate that will make your game run and feel smoother.
If you are getting an extremely low frame count, you’d wanna turn down the graphics quality to low and see how much frames it gives you.
Alternatively, you can opt for more custom control to adjust everything manually, like the lighting, texture quality, foliage, shadows, etc.
Start by adjusting some of the more intense settings first like shadows and finding the right balance between quality and performance. Lighting, texture quality, water and hair effects, foliage all of these demand GPU resources, and adjusting their intensity will surely give you a frame boost.
Anti-Aliasing is probably the most resource-heavy culprit here, and turning it down or even entirely off will provide you with a massive increase in your frames. AA is responsible for removing those jagged lines from your games that make the characters and world around them appear “boxxy.”
There are many different types of Anti-Aliasing techniques, and to learn more about what they are and what they actually mean, click here.

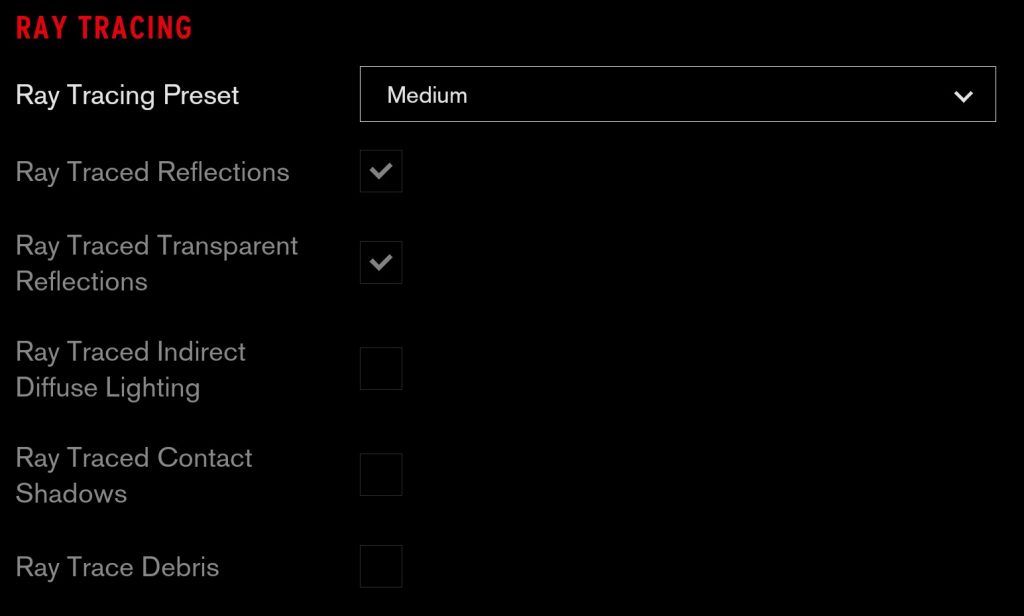
Another GPU-intensive feature in modern games is “ray tracing.” Ray tracing is a very fancy lighting technique that allows for very realistic and atmospheric lighting to appear in your game.
It’s currently only available in Nvidia’s RTX 2000 and 3000 series GPUs and soon-to-come in AMD’s 6000 series GPUs as well. So if you have a ray tracing enabled card, turning it off is an effortless way to gain some serious frames.
3- Turn Down Your Resolution.
You’ve tried everything and have turned down all the settings to the lowest and turned off everything you could, but you’re still hovering around that 20-30FPS mark.
The next best thing to do now is to lower your screen’s resolution. Less resolution means that your GPU has to push fewer pixels, which reduces the GPU burden and gives it some extra room to fuel those frames.
Almost every single game gives you the option to lower the resolution from its built-in settings. If you’re playing at 1080p, try turning it down to 900p or maybe even 720p.
The higher your resolution, the harder it is for your GPU to render those pixels, so you will have to keep lowering your resolution until you get the desired FPS you want.
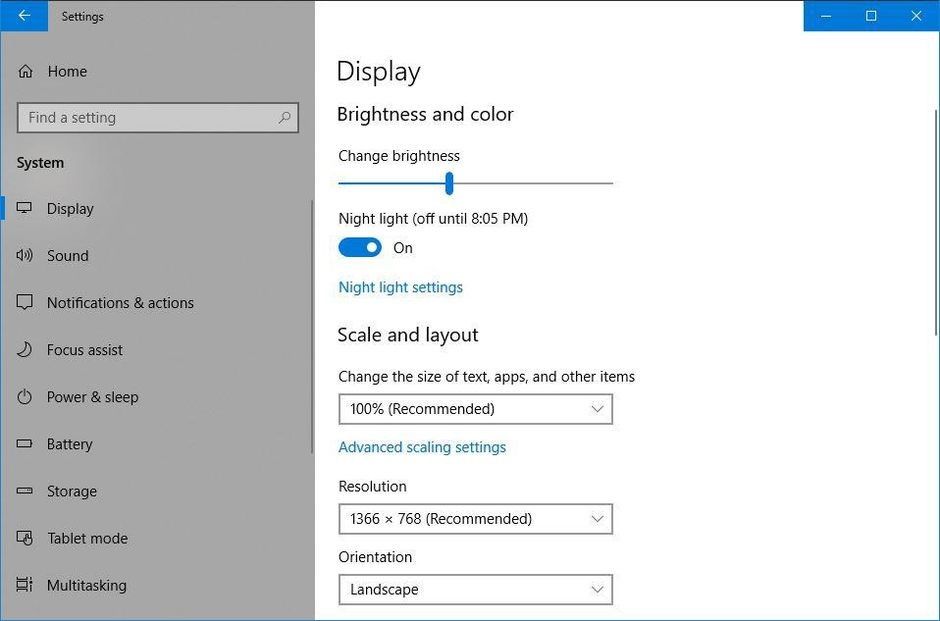
If your game doesn’t have a resolution setting built-in, you would have to lower it in your Windows settings. But beware, turning down your resolution in Windows settings actually reduces your monitor’s resolution entirely, meaning it will remain low even when you’re not actually playing anything until you change it back.
To change your monitor’s resolution, go to Windows settings, and open the “Display” option. Scroll down until you see “resolution” and turn it down to the next best option. See if your frames have improved to the point you desire and keep lowering your resolution until you achieve the FPS you want.
4- Turn On Game Mode.
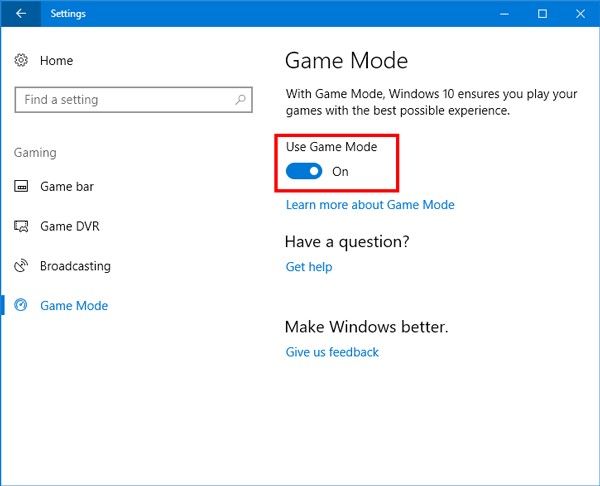
Back in 2017, Microsoft released the Windows 10 Creator Update, and with that update, we saw the introduction of “Game Mode.” Game Mode is a toggle in Windows settings that allows for a smoother overall gaming experience, allowing even older hardware to run games at better FPS. When you turn on this feature, gaming becomes the priority on your PC to get better quality and performance.
Game Mode essentially is a simple resource allocation tool, meaning that it takes all of the resources available on your computer (CPU, GPU, RAM) and prioritizes them towards what you’re playing.
It turns off or minimizes all background and idle processes running on your PC and maximizes your GPU’s potential to give you the best frame rate possible.
To turn Game Mode on:
- Press the Windows Logo Key + G to open the Game bar.
- Select Settings in the Game bar.
- In the General tab, select the Game Mode checkbox.
Note: Some games automatically turn on Game Mode. If so, the checkbox will already be selected.
One important thing to keep in mind is that Game Mode is meant for lower-end hardware. Enabling it doesn’t necessarily mean that you will always see your game running better. In fact, on capable hardware, it actually has adverse effects, resulting in worse overall performance.
5- Kill Unnecessary Processes And Disable Startup Items.
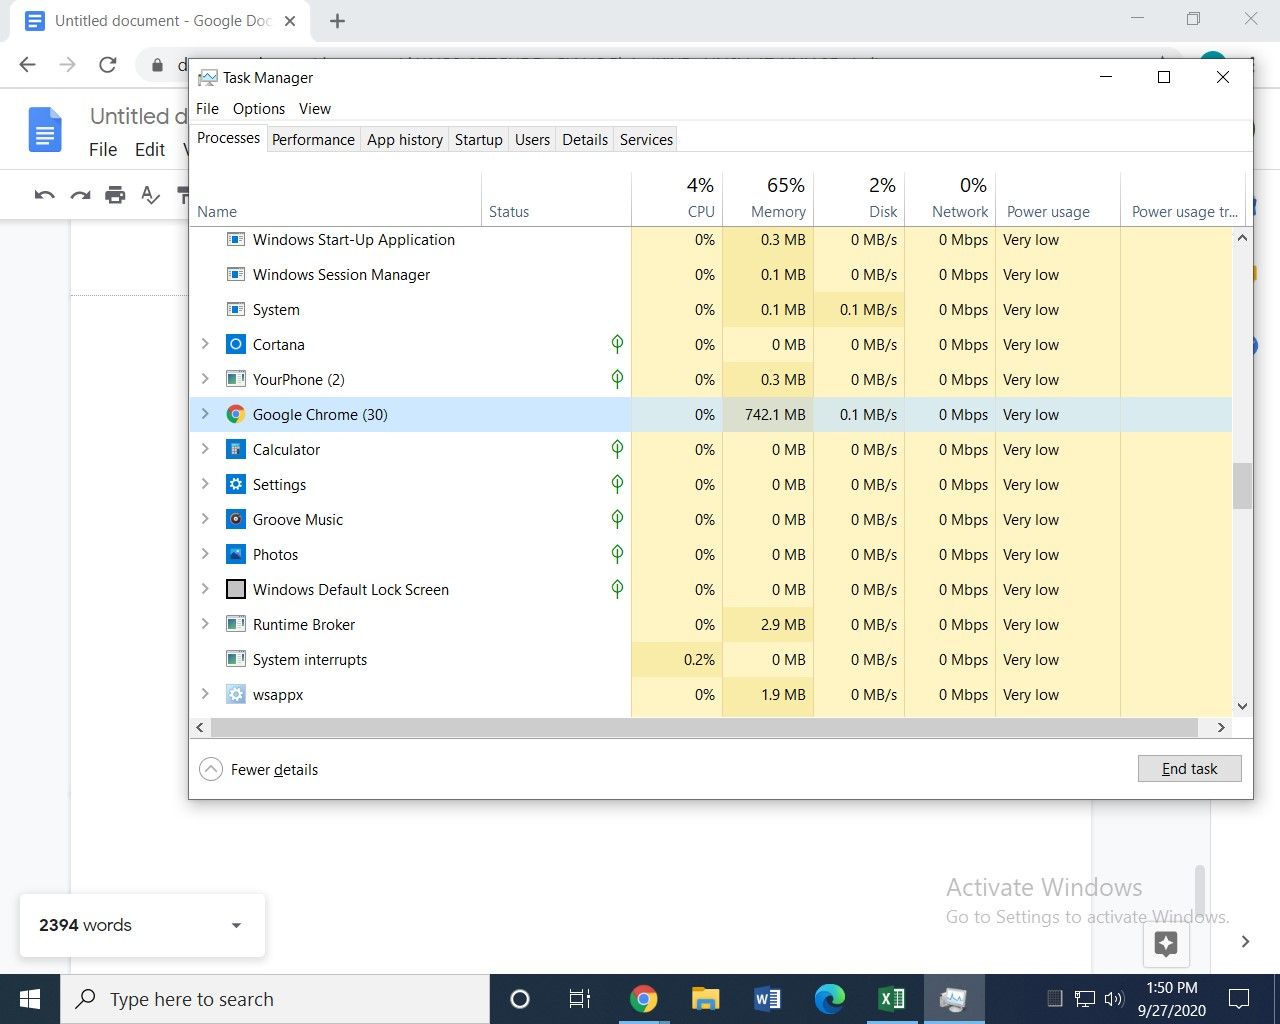
Many background processes and services are running on a PC, and it’s best to disable some of them while you’re gaming. Apps like Skype and Microsoft Office often keep running in the background from the point you boot your PC when you close it.
You don’t need to run these background processes while you are gaming, and turning them off will ease up a considerable amount of your computer’s resources, which then can be utilized by a game.
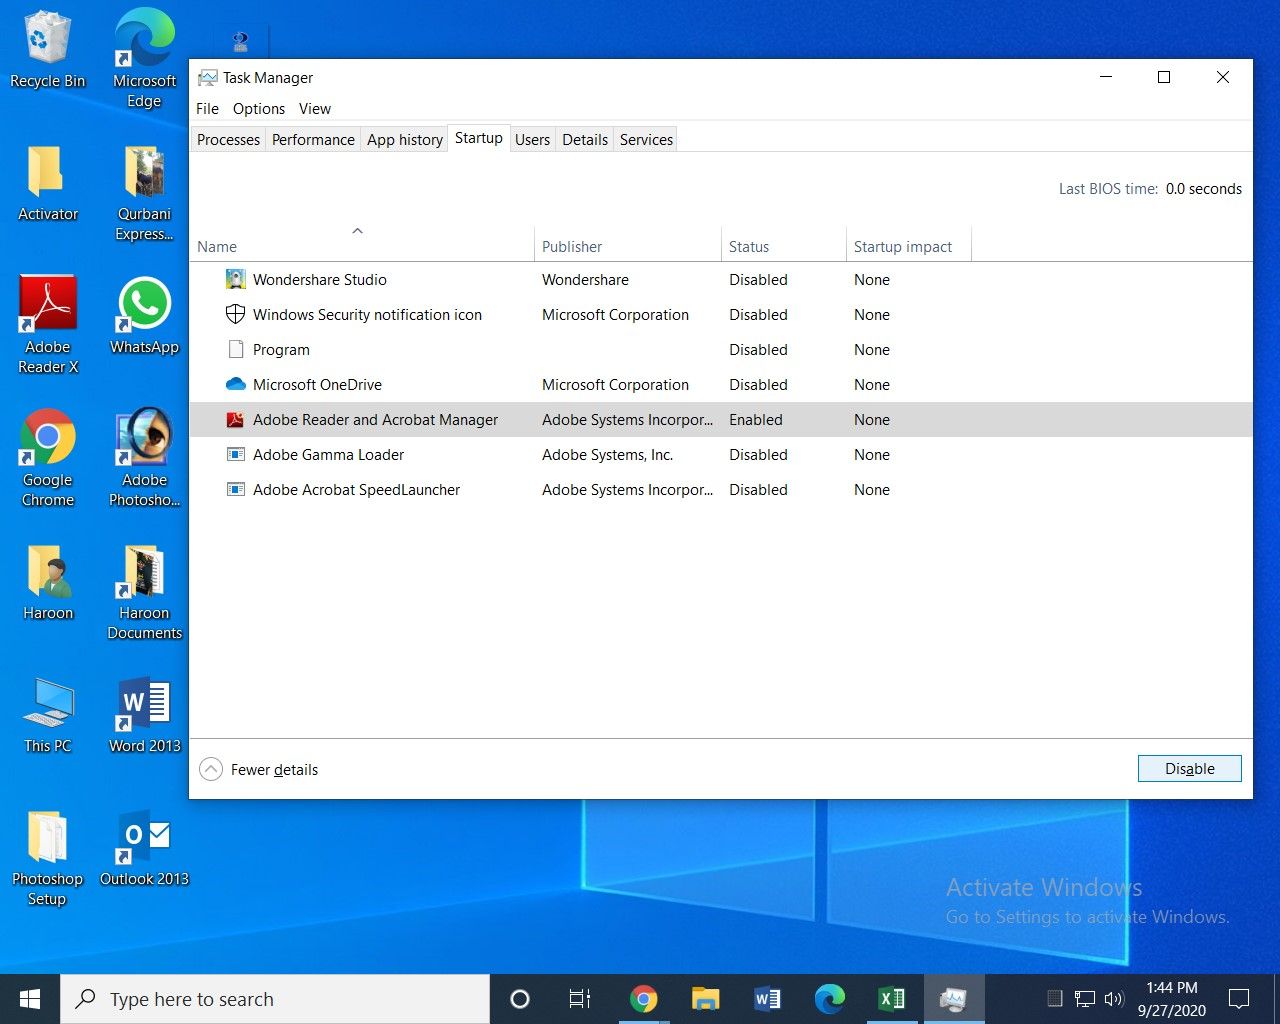
The same goes for the startup, like I mentioned above how applications like Skype start running in the background from the point you turn your PC on, some applications are set up to start alongside your PC.
Meaning they will open and run in the background (sometimes in the foreground) when you start your PC. Now, at this point, I don’t need to explain to you how hungry these applications can act and starve your computer off of its power, so let’s just see how to disable them.
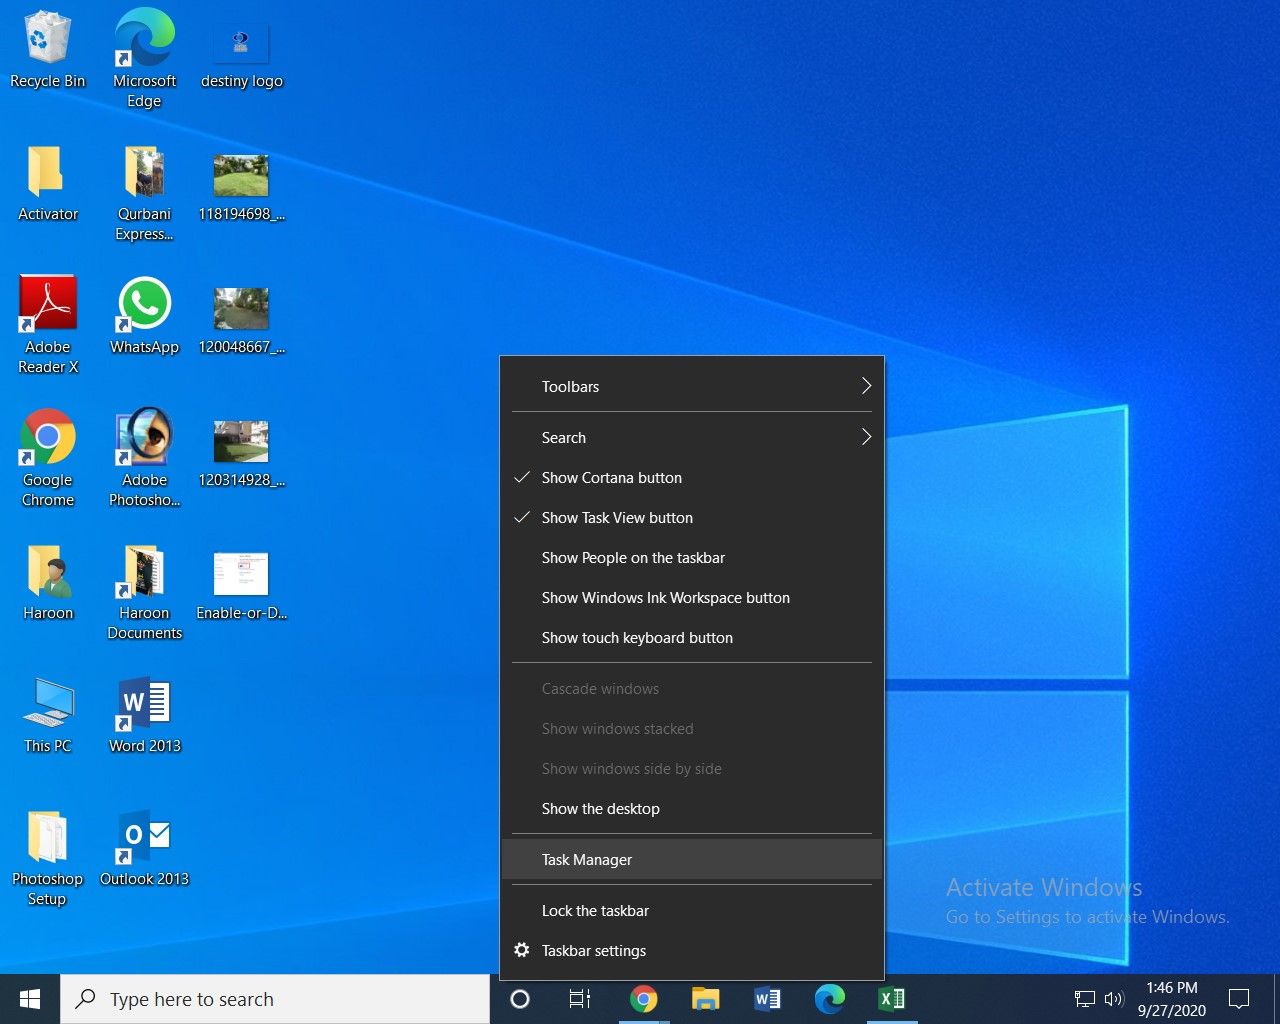
Right-click on the taskbar and click on the task manager. OR Type press Ctrl, Shift, and Esc on your keyboard at the same time to bring up the task manager.
6- Change Power And Performance Option Settings.
Windows has a power and performance setting that adjusts between allowing the best possible performance out of your computer or the least power consumption.
This option is really only meant for laptops as they are supposed to run on batteries, so changing this setting to allow for the best performance can give you a slight FPS bump as well; it’s really a no-brainer to opt for the best performance mode. To change this setting:
A)
- Open Control Panel,
- Go to system,
- From the left column, select Advanced system settings,
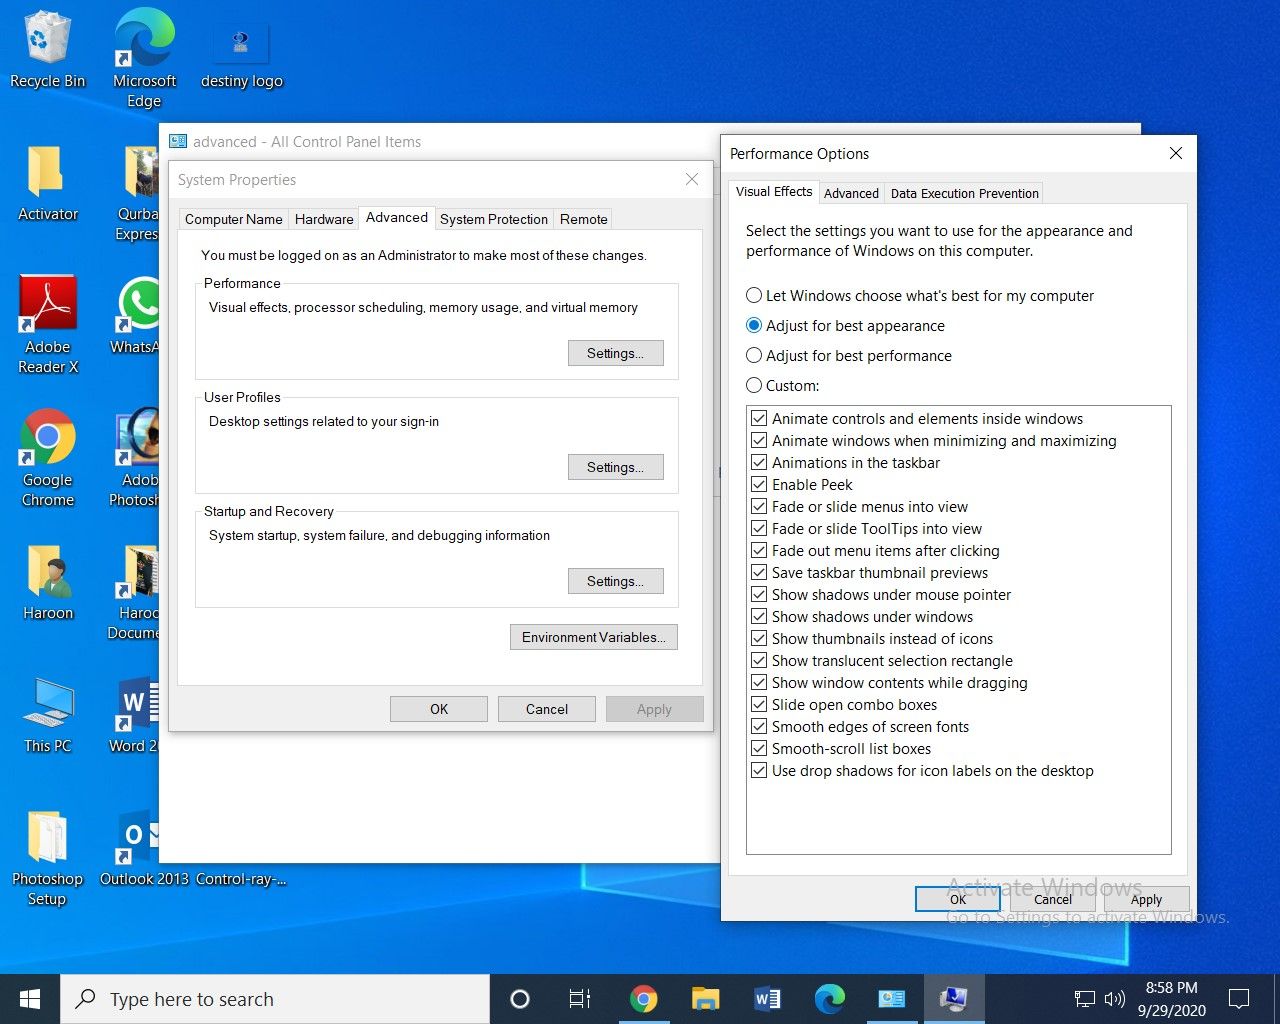
- In the new window opened, select the Advanced tab and on the performance, section click on Settings,
- Check Adjust for best performance.
B)
- From Control Panel, go to Power Options,
- Select the High Performance / Ultimate Performance power plan.
7- Install Razer Cortex.
Razer Cortex is an all-in-one PC optimization software, and its job is to make your computer run games better.
With Razer Cortex, you can explore your system’s full potential with various performance-enhancing and optimization tools for higher frames per second, or even cut down on draggy load times.
There is an automatic mode inside the software that does everything for you, or you can alternatively manually tweak it yourself, your PC’s full gaming potential is now at your fingertips.
Evident to its name, the software comes from the famous peripherals manufacturer Razer. The software does all the necessary things like clearing out broken registry items, emptying the recycling bin, and even freeing up RAM from other tasks/processes and allocating it to the game on your screen for better FPS and performance.
8- Overclock Your GPU.
Overclocking your graphics chip can be seen as sort of the last measure against meddling FPS and maybe your final option to get more out of your computer without actually spending extra cash.
However, overclocking is not for the faint of heart, or in PC terms: noobs. You should fully understand your computer’s ins and outs and how overclocking works before even trying it, or you can seriously damage your hardware.
Even though overclocking these days is easier than ever before, it’s still good to be precautious. So make sure to educate yourself before following the instructions below.
There are 2 ways to overclock your GPU. The first is to use first-party software, and the second is using third-party software. Your GPU brand (not manufacturer) bundles software with the GPU to change the various settings within the graphics card and overclock it.
For example, if you have an ASUS card, you can download the ASUS GPU Tweak II utility and access the many advanced settings available in that software and overclocking.
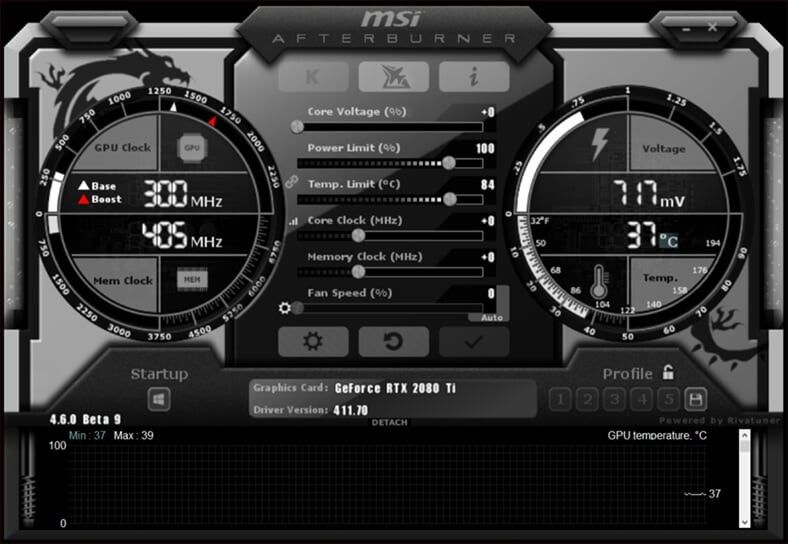
Alternatively, you can use third-party overclocking software like MSI Afterburner, which allows for overclocking of basically any GPU out there, regardless of its manufacturer.
MSI Afterburner gives you access to multiple different graphical settings and will enable you to monitor and adjust the smallest possible things in your GPU.
Overclocking increases your GPU’s temperature by about 5-10°, so be sure that you have sufficient cooling and airflow inside your case to prevent overheating. Also, it’s recommended to only boost about 30% over your graphics card’s factory clock to refrain from running into any issues.
Download MSI Afterburner here.
Note: Overclocking voids your warranty.
9- Overclock Your CPU And RAM.
Your processor and memory can also be overclocked to take advantage of higher boost clocks. It’s relatively safe to override the factory clock set by the manufacturer as long as you’re not going crazy with it.
However, overclocking the RAM and CPU isn’t as straightforward as your graphics card.
You need to boot into the BIOS to increase the clock rate of your RAM. There are many speed configurations out there, ranging from 1666Mhz all the way up to 5100Mhz.
And not all motherboards support high speeds and/or some processors don’t either. For example, 9th gen Intel chips only support RAM speeds of up to 2666Mhz, whereas 3rd gen Ryzen chips support up to 4000Mhz.
Be wary that OC’ing your RAM would have a tiny improvement on your gaming experience, and you might still see similar FPS to what you saw before you overclock your RAM.
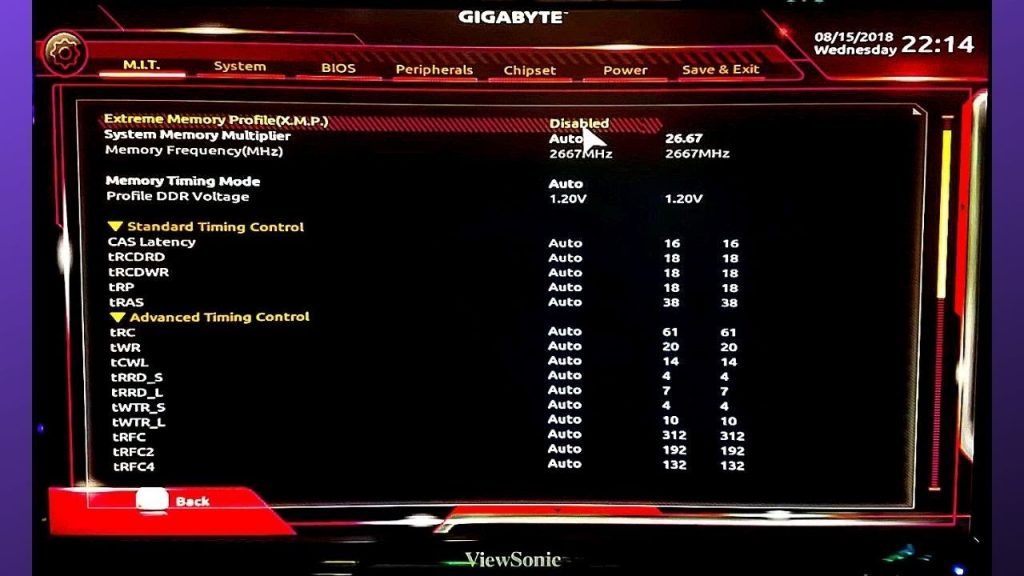
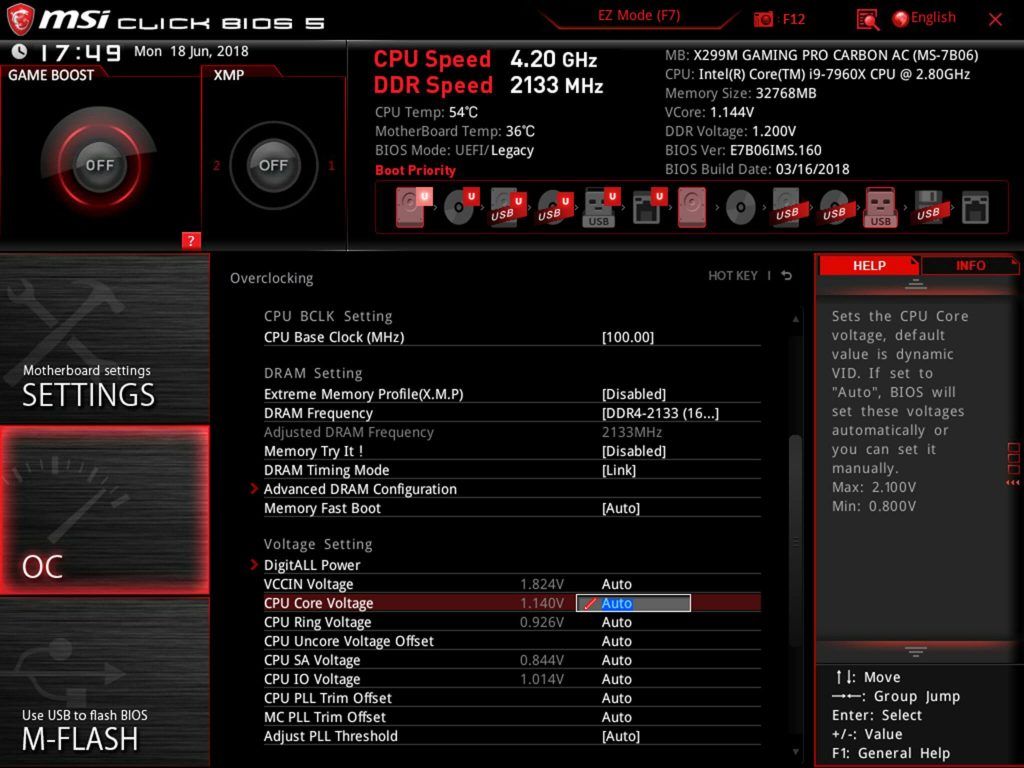
There is only one way to OC your memory: your system’s BIOS (or UEFI). A lot of the time, when you put in a RAM stick in your motherboard, it does not run at its advertised full speed out of the box, and you need to increase its rates through the BIOS.
To overclock your memory, you will first need to have a basic understanding of how memory actually works. Intel XMP is the most popular and most comfortable way out there to overclock your RAM as Intel XMP creates a custom memory profile containing all the little settings like clock rate, voltage, cash latency, etc. you can just select in your BIOS under the memory settings and overclock your RAM.
Overclocking your processor is a similar ordeal, albeit a bit more complicated. See, not all CPUs are overclockable in the first place. You will first need to identify if your CPU can even be overclocked before you proceed any further.
If you have an AMD chip, you’re in luck because all AMD processors can be overclocked out of the box, no matter which generation you own.
A processor operates at a specific voltage, meaning that it only uses that amount of voltage to power itself. When you overclock your processor, you need to be aware of this because if you overclock it and don’t increase the operating voltage, you might end up frying your processor.
Overclocking a CPU is really a check and test procedure in which you increase the clock rate incrementally, reboot your computer, and stress test it to see the temperatures.
You have to keep repeating this process until the desired performance to temperature ratio is achieved in which you OC your processor to the max limits your cooling allows you.
For a more comprehensive and detailed guide on how to overclock your CPU, please click here
Note: Overclocking voids your warranty.
10- Defragment your Hard Drive.
Defragmentation is the process of reorganizing the data stored on your hard drive to improve its efficiency and performance. Over time, as you add, delete, and modify files, they can become fragmented, meaning they are stored in non-contiguous locations on the disk. This fragmentation can slow down your computer’s overall performance as it takes longer to access scattered pieces of data.
By defragmenting your hard drive, you can rearrange the fragmented files, placing them in contiguous blocks, which allows for faster and more efficient access. Defragmentation helps to optimize file retrieval times, improve system responsiveness, and prolong the lifespan of your hard drive. It is an essential maintenance task that helps to ensure your computer runs smoothly and efficiently.
Here’s how to defragment your hard drive (Windows )
Step 1: Click on the search bar at the bottom left of your screen next to the start menu
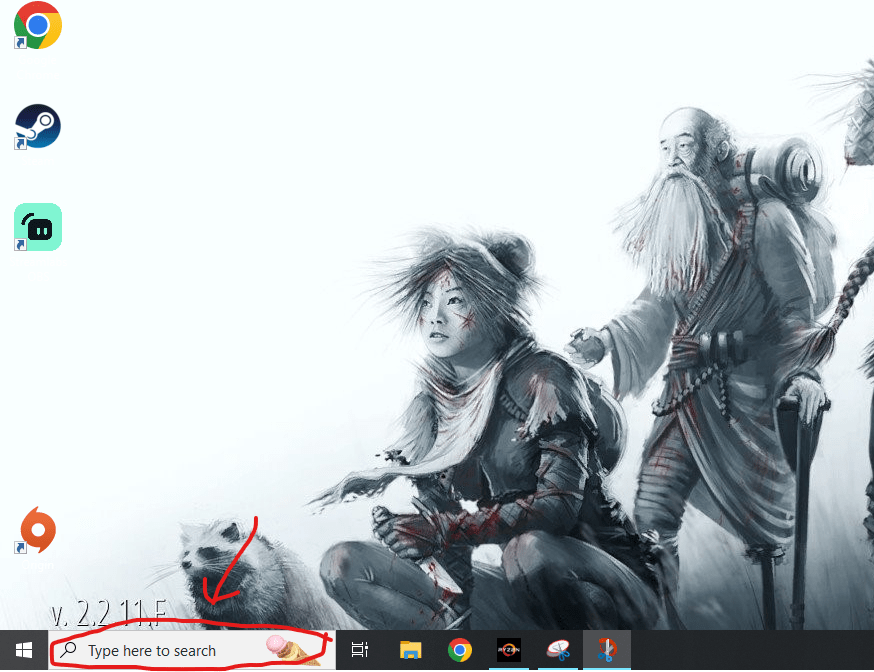
Step2: Type Control Panel in the search bar. As you start typing a search results will show up where you will see the option of control panel.
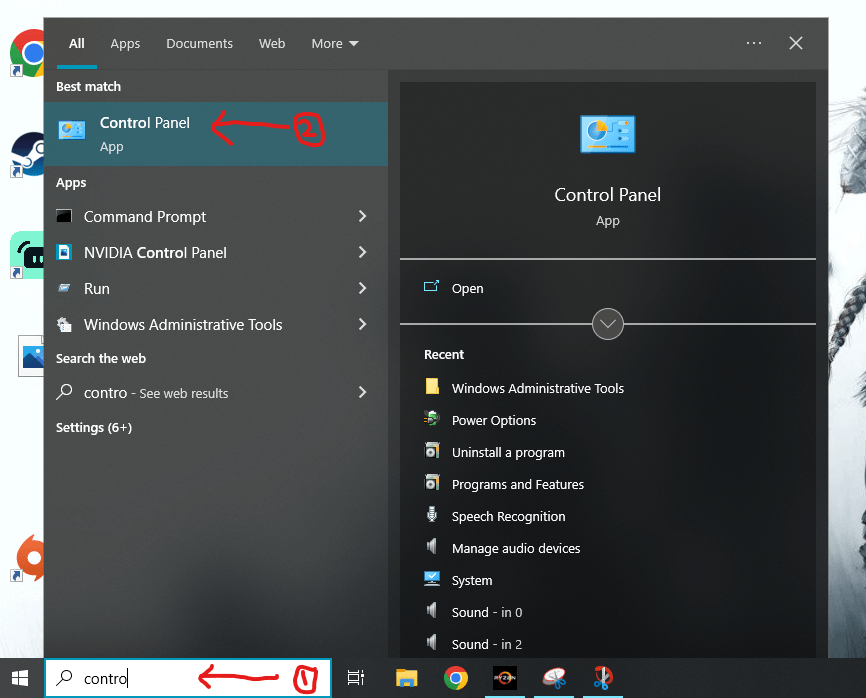
Step 3: Click on the control panel. A window will open up with the options. Find the option “Administrative Tools” on the top left. Click on it.
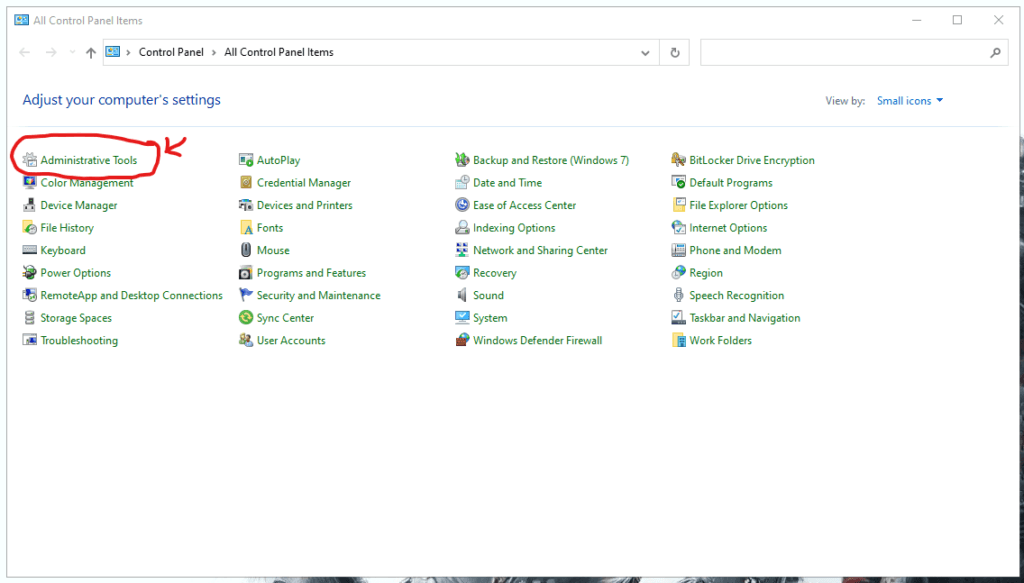
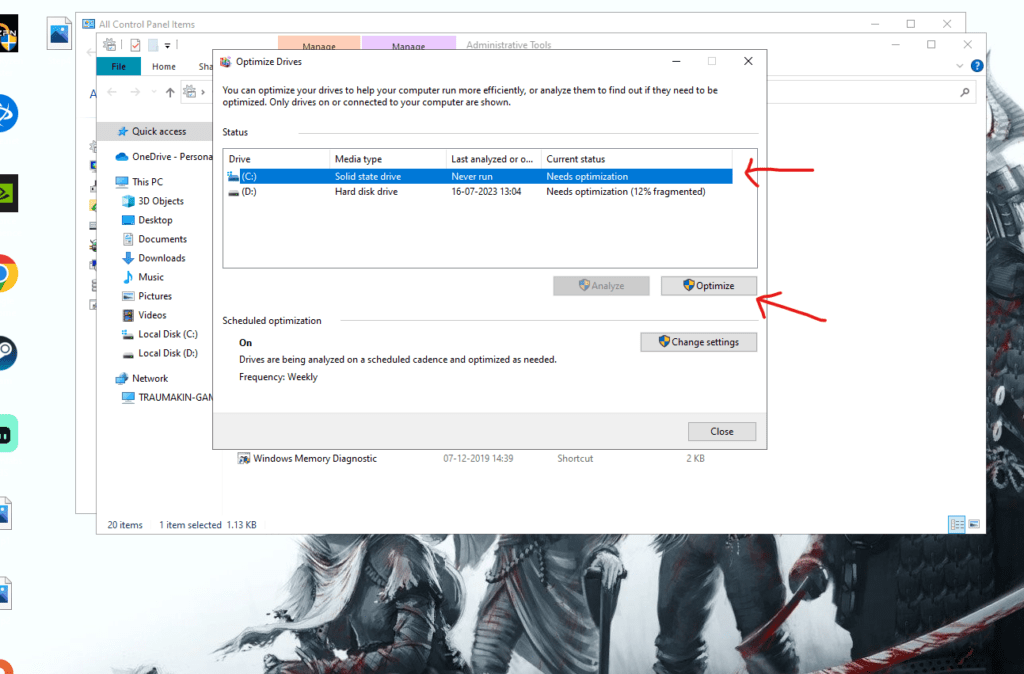
Step 4: Find the option “Defragment and Optimize Drives” in the list of options in the window which opens up after clicking administrative tools. Double click on the Defragment and Optimize Drives option
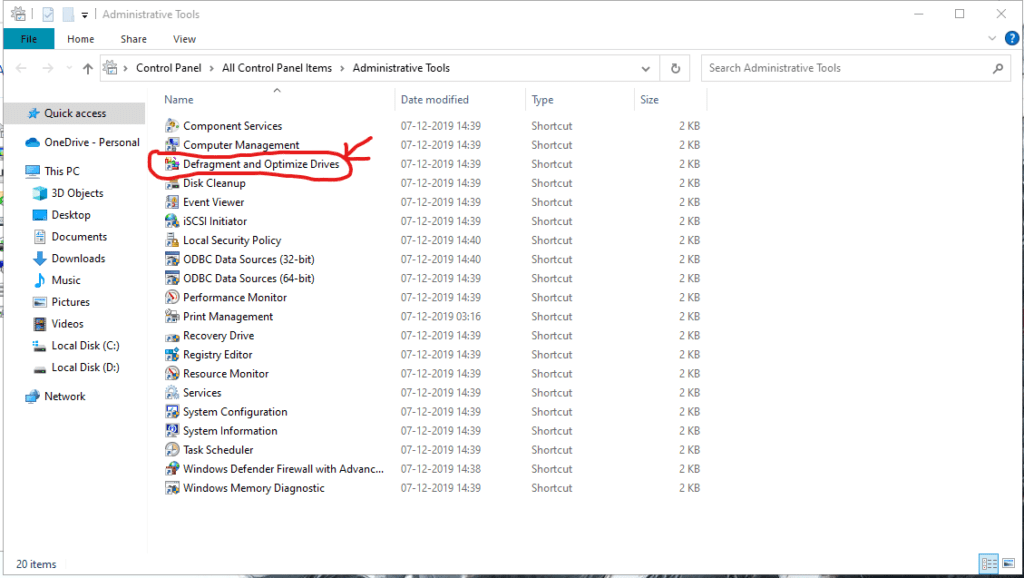
Step 5: The Optimize Drives window which open up will have a list to drives that are attached to your computer. Click on the drive you want to defragment and click “Optmimize” to start defragmenting.
11- Upgrade Your Hardware.
Buying new hardware is the absolute last resort for increasing your computer’s performance and getting more FPS in your games.
You might think that upgrading the graphics card would be an obvious choice since it’s most likely the culprit holding back your PC, but that’s not entirely the case.
Bottlenecking is a genuine problem that occurs in many computers; when one component in your computer is not as powerful as the others. And as long as you have a bottleneck in your system, you are losing performance and not utilizing your computer’s power.

For example, pairing a Ryzen 5 3600 with an RTX 2080Ti might sound like enough since the R5 3600 is an excellent chip for gaming and productivity but, it’s still not a high-end chip while the RTX 2080Ti is a high-end GPU. So in the process of using these 2 parts together, you are introducing a CPU bottleneck in your PC.
The first hardware upgrade you should be doing is ending the bottleneck in your computer, if there is one. Otherwise, buying a new graphics card is most likely going to finish your low FPS suffering.
But it’s not that simple. Some games are more CPU-dependent than others like Counter-Strike. For those, you’re better off upgrading your processor than your GPU.
So, diagnose and find out the weakest part of your computer and spend money on that. Upgrading to better, more recent hardware can drastically improve your frame count in and give you a smoother gaming experience.
Final Verdict:
Likely, you don’t need to spend a dime to increase your computer’s gaming performance and squeeze more FPS out of it.
It would be good practice to go through and try all of the steps mentioned above to see if they increase your frame rate and, if none of them work, maybe it’s finally time to throw some cash towards an upgrade.
Make sure you keep your PC clean at all times to prevent any overheating issues and to just increase the general lifespan and longevity of your computer as well.
And, for the love of God, please don’t fall for any “download more RAM” scams on the internet; insteading of improving your frame count, it’ll likely just give your computer a virus. It’s 2023, folks, c’mon.
Frequently Asked Questions (FAQs)
1- Can more RAM increase your FPS?
Adding more memory to your system can increase your FPS, but the improvement would be minimal.
2- Why is my FPS so low?
You’re likely running on lower-end or old hardware, which has a hard time fueling those frames.