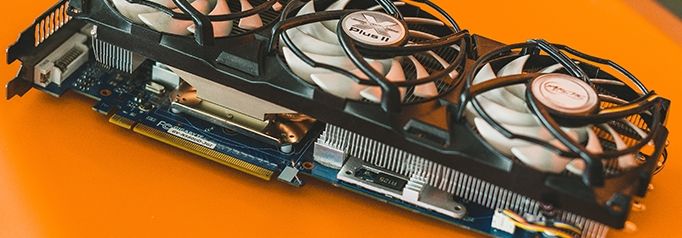
Graphics cards come in all shapes and sizes; some are obnoxiously beefy while some are cutely small (I’m looking at you, 1070 ITX). But pretty much all of them use the PCIe standard to connect to your motherboard and power your gaming rig.
Removing a video card sounds like a straightforward ordeal, and truth be told, it is if you know what you’re doing. There are some vital things, along with precautions, that one needs to be wary about before just blindly ripping out the GPU from the motherboard.
Whether you are upgrading from an older chip to a brand new one or you want to know how to remove a graphics card from your computer for cleaning / upgrading, this guide has got you covered!
Preparation – Choosing A New Card.
If you are not taking out your graphic chip just for cleaning, then it’s a great idea to decide what you’re going to be replacing your current one with.
Before you take out your current card from your motherboard, firmly determine what you will be replacing it with.
Many factors go into making this verdict, like the TDP of a new chip versus what your power supply can handle, the features that come packed with the GPU, the aesthetics and cooling, and of course, the sheer power and if you need it or not. This is a subjective decision best left to the buyer.
Remove Related Software And Drivers.
Every graphics chip comes with its proprietary drivers to properly communicate with the other parts in the computer. You must delete all of these drivers so they don’t interfere with any future parts you’re going to put in your system.
To delete these drivers, you will first need to find them. It’s relatively easy to locate and delete these drivers. Press the Windows button + R to bring up the Run box. Type “devmgmt.msc” and press run. This will open up the Device Management window; now, all you have to do is locate your graphics drivers here and uninstall them, that’s it.
Some GPUs come with a software bundle that allows you to monitor, adjust settings, and overall control all aspects of your graphics. Alternatively, you could have also downloaded specific software to better take advantage of your video card, like the AMD Adrenalin software. Whatever it is you’re rocking, you will also need to uninstall or delete that.
Getting Started – Open Your Computer.
Before doing anything, I highly recommend you wear an “anti-static wristband,” which will safely ground you to prevent any potential damage to your computer’s parts, even when everything is turned off.
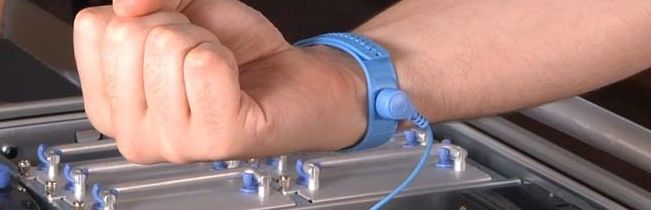
You can build up loads of static electricity in your body over time, and coming in contact with another piece that has electricity still inside it CAN cause a short circuit to occur, very much likely frying up your GPU in the process, so to be on the safe side here, please ground yourself properly.
The next thing you have to do is open up your computer case. Make sure to turn off your computer and unplug all the cables from your computer.
There is a side panel on every PC case that comes off to reveal the insides of the computer; there is no standard as to how this side panel is held on to the case as it entirely depends on the case maker itself. It could be held in place with screws or just metal or plastic clamps that can be released by pressing a button, as I said, no standards.
After you have removed the side panel, put it aside in a secure place because now it is time to get into the nitty-gritty.
How To Remove A Graphics Card.
There are four distinct steps needed to remove a graphic card from a computer properly. Firstly, you need to unplug all the power cables connected to it, unscrew it from the case, detach it from the PCIe slot and, finally, store it safely in an anti-static bag. Let’s begin.
Step 1: Disconnect The Power Cables From The GPU.
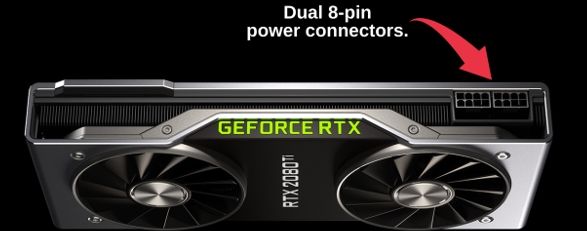
All modern-day or even relatively recent video cards come with a PCIe x16 connector that plugs into the corresponding PCIe x16 slot on your motherboard. But that single PCIe slot can only provide up to 75watts of power.
At the same time, most cards these days require (much) more than that to supply more energy in; GPUs use PCIe power cables to pull more wattage directly out of the PSU using 6-pin or 8-pin power connectors, in some cases even a combination of both.
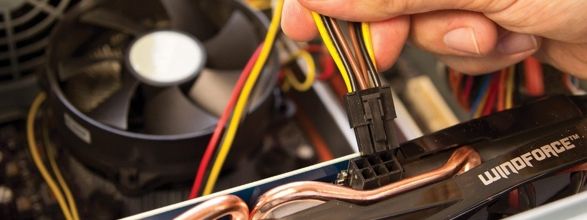
So, if you have cables connecting your GPU to your power supply, you will need to unplug them. Remove the power cables by pushing the little plastic clamp on their connector tips and gently pulling the connector out. Tuck the cables to the side so they don’t come in your way while you work.
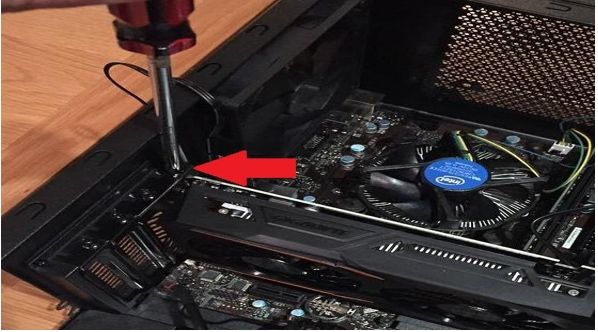
Step 2: Unscrew Your Graphics Card From Your Case.
Most video cards are screwed into place on the side of the case to prevent sagging since they can get cumbersome. Usually, the GPU is mounted to the PCIe bracket held onto the spot with just one screw (or up to 3).
Unscrew it from the case using the appropriate screwdriver, and you’re golden. But don’t just push it out yet; there’s one more thing you need to do before that.
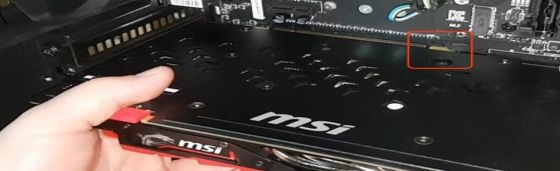
Step 3: Release The Graphics Card From The PCIe Slot.
Just to the right of where your graphics card is plugged in, you will see a small locking mechanism; it could be a simple tab, switch, slider, or a button. The job of that tab is to lock the GPU into place on the PCIe slot.
To locate the tab and either press it, slide it, or pull it out, depending on your motherboard’s manufacturer, and you will hear an audible click, indicating that it’s free from the PCIe slot, ready to be finally pulled out.
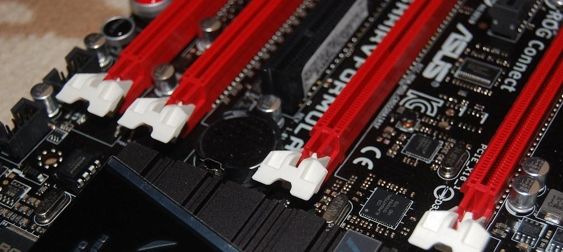
The little white tabs on the red PCIe slots are the locks that hold cards into place and lock them in. You should see a somewhat similar lock on your motherboard as well.
Step 4: Pulling The Graphics Card Out.
At last, all is set and done, and the only thing left now is to pull out the graphics unit from the motherboard. Grab it from the middle of the side with one hand (both if it’s a thicc boi), avoiding touching any bare PCB.
And gently pull it out, making sure you don’t hit it against your case while taking it out. Congratulations, you have successfully removed your GPU!
How To Store Your Removed GPU.
Don’t just leave your newly removed graphics unit out in the open. It still needs to be preserved carefully to maintain its lifespan and increase its longevity.
If you still have the original box that the card came in, take that out and clean it thoroughly. Get an anti-static bag and put your unit inside it, close the bag, and put it inside the box. Place the box in a safe and secure place away from direct sunlight.
Suppose you don’t have the original box, no need to panic. You can still store your video card in any container that’d the right size, according to your GPU. Just make sure to place it in an anti-static bag first before putting it inside the box, or anywhere for that matter.
Conclusion
It sounds pretty straightforward, removing GPU from a computer, but like everything in life, it’s the little details that matter. The way you pull it out, unscrewing it before pulling it out, making sure the PCIe latch is released, and getting rid of all the software and drivers it came with are all crucial steps one needs to follow to execute a removal properly.
If you’re upgrading, it’s essential to store your older GPU to keep it intact. And if you’re taking it out for cleaning, make sure to get it spotless before putting it back in your PC. If you do anything with enough confidence and the right knowledge, it will become a piece of cake.
Related readings: