Being a gamer, you should be aware of the issues your PC hardware might face over time. You shouldn’t take them easy just because they are minor issues, but as time goes on, these “minor issues” can evolve into major issues.
GPU is a delicate part of your system which needs extra care, regular monitoring of temps, and making sure you avoid the biggest threat to GPU lifespan, Dust. Dust is a horrible enemy that stays and starts collecting in your PC over time, especially your GPU.
If you are passionate about gaming, show some love for maintenance and caretaking of your components. Dust reduces GPU lifespan, and performance and gives birth to another dangerous threat, heat. And I am telling you, you don’t want to face them together at once.
I can understand if you are hesitating to open your GPU manually and clean it because it is an intimidating task for first-timers, but thanks to guides like this, you can become self-aware of DOs and DONTs and teach yourself how to clean GPU, which is a simple task and believe me it looks difficult than it is
How Often Should You Clean Your GPU?
The time window between GPU cleanings is, to put it simply, debatable and not the same for everyone. It can range from 2 to 6 months, and it totally depends on your environment.
Now to be clear, dust is everywhere, but it’s just that some places have a lot more dust than others, and they have none but the regional climate to thank for.
Another thing that really matters is the exposure, with greater exposure, you’ll really get a feel of what it’s like gaming perched atop a sand dune in the middle of a desert. Meshwork casings accumulate a lot more dust, so you should keep an eye out for that.
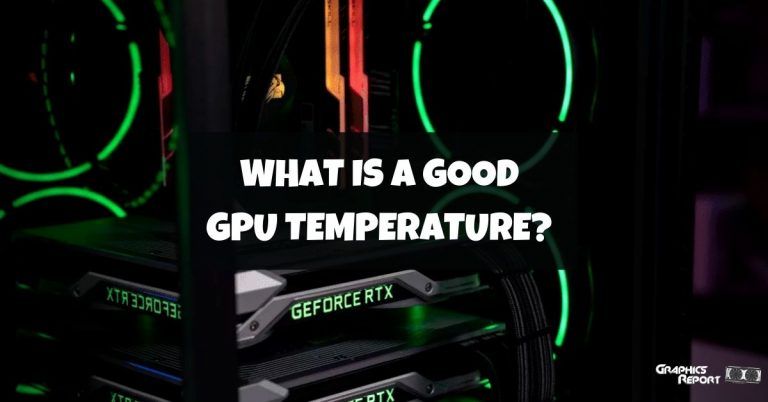
Now, as I have said, there’s no specific time, so to know when to clean your GPU, keep an eye out for temperature, and that will give you a pretty solid idea because whenever a GPU is filthy, a spike in its temperature appears, and it heats up.
If it’s hot, it’s time to clean. Generally, a smaller cleaning every 6 months or a deep clean once a year should just work fine.
Related guides:
How to choose a graphics card in 2023?
How to fix “GPU fans not spinning” – causes & solutions
Why Is It Important To Keep Your Graphic Card?
A clean setup has many advantages, from a finer aesthetic to an improved performing capability. Physical cleaning of the GPU is important for it to function properly because huge performance drops are noticed otherwise. By cleaning your GPU, you can improve and increase the crucial airflow and enhance overall performance.
Cleaning the GPU also lowers its temperature, as I have said earlier because all of the dust gets its way, but after a thorough cleaning session, you will notice improvements because the temperature goes down; otherwise, graphics cards that have been friends with the dust can cause your PC to crash and create other problems like restarts and power-offs. Cleaning, unsurprisingly, also helps increase the lifespan of the card.
Below Are The Primary Causes Of Damage To Any GPU:
I can point my finger at many things that are involved in damaging your graphic cards. Let’s start with the basic and more frequently occurring problems. There is no one to blame when these problems arise, especially if someone is new or unaware of what’s happening inside the PC system.
One major problem that can build up over time and become a nuisance is Heat or overheating, to be precise. Heat is not dangerous; overheating is. Along with dirt or dust, your pc is on its way to doom.
#1- Heating Is The Primary Cause Of GPU Failures
As I said, heating is not bad or dangerous. You are running a machine that is capable of producing power, and it is running on electricity, so heat production is inevitable.
You can’t stop it from happening, what you can do is to make sure your PC doesn’t overheat. Too much of anything is harmful. Overheating means your GPU is working at higher than maximum levels of heat endurance.
For long-term running, this is bad news; you are looking at a potential decrease in GPU lifespan, thermal throttling, stutters during games, and all the worse things you can think of. Overheating plays a major role in the death of your beloved graphic card.
#2- Dirt And Greasy Dust
Talking about the worst enemies of GPU, this is another one that can be responsible for permanent GPU damage. Unlike heating which is easy to manipulate through software, dirt is here to stay.
Dirt collects itself on the base of the GPU, and gradually, it starts to sit, becoming greasy. Hard to clean without taking precautions. GPUs need cooling, and that’s why most modern GPUs come with pre-installed heatsinks and cooling systems inside their body.
But dust gathers layers that stop heat from escaping, and as a result, the heat is trapped inside. And what happens when your GPU overheats? It dies or endures permanent damage.
#3- Your GPU Is Not Compatible Enough
This is a more technical aspect that is related to PC building. If you are passionate about gaming, then at the very least, you can gain knowledge about your PC parts.
Not because you are about to build a PC, but because you should know what components are installed in your PC, or are they compatible with each other? I can’t imagine pairing a decade-old GTX series card with an i9 12th gen beast processor. That will be brutal.
For the purpose of showing a display, maybe it works. You can use it while you are waiting for your new GPU to arrive, but if you start any AAA video game on this build in hopes of playing it.
Your GPU will bottleneck severely and might stop giving display. It’s like pairing a kindergarten student against a UFC champion in a fight. Avoid doing this
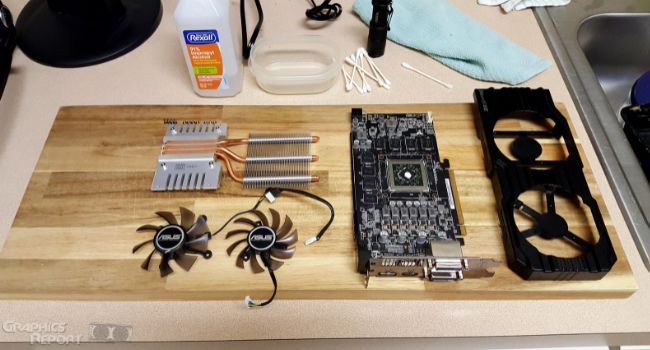
Here Is A List Of What You Need To Clean Your GPU
Now onto the cleaning guide for GPU before you pull out your GPU from the casing. Make sure you are fully prepared with all the essentials you need. You don’t want to spend time looking here and there for things.
Cleaning and disassembling the GPU takes a lot of time itself, so you can really use precautions to save time and make this process as quick as possible.
What do you need for GPU build? Clean surface first of all. The large table can work as long as it is clean. Remember, you are cleaning your GPU, so placing your GPU on a dirty surface kind of defeats the whole purpose.
Use a clean cloth and spread it on the surface or a rubber mousepad. The reason is you don’t want the GPU to be in contact with hard surfaces. Either your GPU will make a scratch on a table, or your GPU will get scratched.
A soft rubber mousepad is enough to make this work. And ofc, for disassembling, use screwdrivers, a bristle brush for cleaning, and microfibre cloth with rubbing alcohol so you can clean off the dried thermal paste. You would also need a small size dust blower to dust off your GPU before you start cleaning. Once you are prepared, you can start
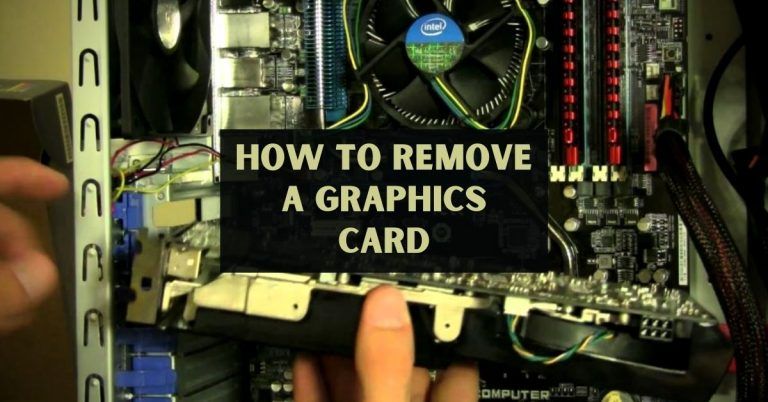
How To Clean Your Graphics Card Step By Step!
The first step of this tutorial, take out your GPU from your PC case. GPUs are big components, so they tend to get dustier, make sure after you have pulled GPU from the case and placed it on the rubber pad.
Wipe any particle of dust from your hands. You would want to do this with clean hands to avoid making a mess. Use your blower to dust off any dirt before disassembling your GPU.
Maintain your distance while blowing your GPU, you don’t want to damage any components inside from the high air pressure coming out of the blower.
Use your Philips screwdriver to carefully unscrew the back of your GPU. remembers to keep those screws in front of your sight so you remember which screws go where.
Take out the backplate slowly without any hard pulling and place it aside. You will see the heatsink in front of you with thermal pads. And some fan connectors that connect the fan to your PCB board. Be very gentle because you need these fans for cooling. That’s the whole point of why you are cleaning your GPU.
The heatsink is a little tricky because it is spring-loaded. Unbolting any screws from one corner will cause the heatsink to catapult that side up, and your screw will launch in the air. Keep your finger on that corner while you are unscrewing.
Do that for all four corners and carefully lift up the heatsink. Keep those 4 screws separated from the backplate screws. Heatsinks firmly keep the PCB board in place, but now you are done with all unfastening of screws, lift the PCB board very gently and in a straight upwards fashion.
Don’t skid it sideways to avoid damaging the thermal pads. After you have lifted the PCB board, you will see the thermal paste on the heatsink. You will know that this is where you are going to apply thermal paste.
If your GPU was suffering from high temps, producing lag and stuttering during gameplay, then most likely, the thermal paste inside is dried up. This is the reason why GPU fails because there is no insufficient cooling
Before you apply thermal paste, you have to carefully wipe off old dried thermal paste. Thermal paste can be purchased from the market to make sure it’s a nonconductive one. Nonconductive thermal paste avoids any passing of electricity, and even if you spill it, you can wipe it off without any issue.
Apply a small amount of rubbing alcohol to the microfibre cloth and gently wipe old thermal pastes. Make sure all thermal paste is removed because you don’t want any layer of dried thermal paste between the new paste and heatsink.
The application of thermal paste should be conservative, i.e., you have to apply a very small amount. The safest and most commonly used method is the dot method. Place a single pea-sized dot in the middle of your heatsink and spread it with the help of a spreader tool on all corners.
You don’t have to spill the thermal paste on the sides, just pour a little amount that spreads enough to the sides and covers up the whole heatsink. You can also put down the PCB board on top like it was before, and the paste will spread itself but do it yourself for peace of mind; it won’t take much time.
Grab the PCB board and use the soft bristle paintbrush to clean any dust particles, use the same brush to clean off any dust from the cooling lid and fans. Take your time, there is no hurry. You don’t want to do this every day, so make sure when you finish, everything looks brand new as it was on the day you bought it.
Now carefully place the PCB board on top of your heatsink, aligning with the screw holes. Put it down in the same straightforward fashion as you pulled out. Remount the spring load bracket down, screwing one screw at a time while holding the mount down with your finger.
It’s all about how gentle and careful you are with your components. Reattach the fan connectors, then the GPU cover, and at last, the backplate. The heatsink should be firmly tightened and in solid physical contact with the GPU.
Now you are done with the process, congratulations. If everything went as planned, then you will have no problem using your GPU. reinstall your back in the case and boot your PC. take a breath of victory when your display pops up on your monitor.
Check your fans if they are working or not. Most GPU fans don’t start spinning unless you put some load on the GPU. In that case, launch your favorite game and start to monitor your temps. Your fan will start to spin, and everything will be fine.
If you still see any issues, you can pull your GPU back and examine it once again now that you know how to do it. You will be feeling confident the second time you change your paste
How Do You Unclog A GPU?
Sometimes the dust gathers inside your GPU, and you can’t really do much. On the surface, you can wipe off the dust with any soft cloth, but inside, you have to manually disassemble the GPU, and now that you have disassembled it, you have to change the thermal paste even if you want it or not.
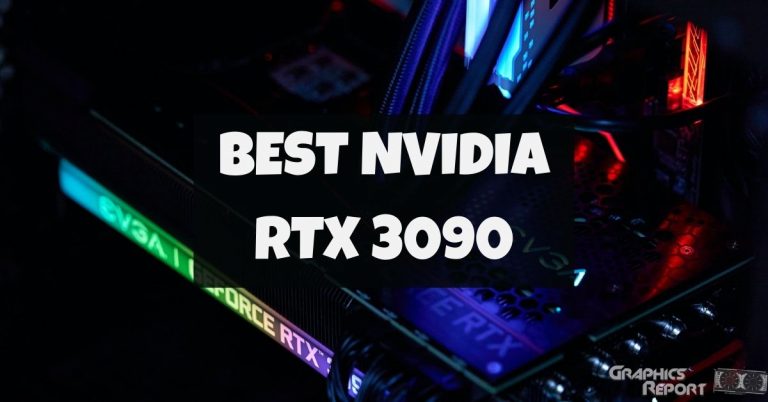
GPUs nowadays come with pre-installed water blocks, especially heavy market hitters like RTX 3090 and its Ti variant. Those water blocks are highly vulnerable to dust attacks. When dust gathers itself on the surface of the water block, it becomes greasy, and this can clog the fins.
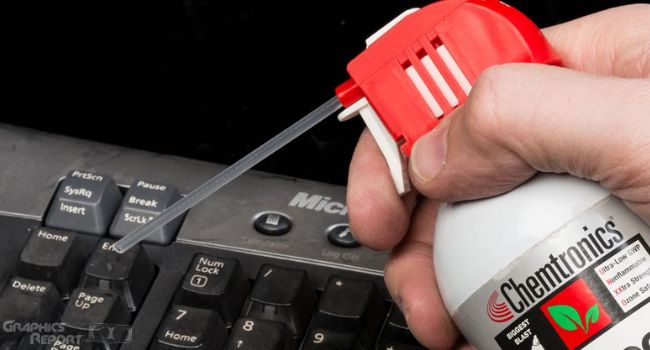
The best solution for this issue is to buy a can of compressed air. You don’t want an air blower this time, compressed air can do the work. It can reach narrow and tiny spots where dust usually settles.
Hold the GPU fans to prevent them from spinning. Behind the fans, you will see heatsink fins. Start cleaning those fins with a compressed air can.
You can reach those tiny hidden spots with a compressed can. Gently do this 2 or 3 times until you see clean spots. If some spots are greyish and muddy looking, this means there is still dust left inside.
Can I Clean GPU With Water?
What I am about to tell you is going to be shocking, but yes, you can clean your GPU or any other PC component with water. But on a condition that before you plug those components back into their place, your component is completely dry and devoid of a single drop of water.
You see, water is not dangerous for components, it’s the electricity that is conducted through water that can kill your GPU. If you are using your GPU, that means there is power inside.
Throw water on it, and you will hear a loud noise followed by the last breath of your GPU. let it dry after you wash your GPU with water. Take 2 or 3 days, and put it out in clear sunlight. Make sure your GPU is dry as the winter season before putting back in your PC.
Can I Clean GPU With Brush?
This is the safest way you can clean your GPU from outside and inside both. But what kind of brush? Any brush that has a soft brush head will work. The brush is also ideal for the motherboard because there are some places you can’t reach with your hands.
The brush works perfectly in those scenarios. The key is to be gentle like you are painting on canvas. Slow, small strokes, just to push off excessive dust and debris from your GPU fins and fans.
My Final Thoughts On It!
Beginners can be easily intimidated when it comes to cleaning GPUs on their own, but it is not hard. It is actually easier than it looks. You are basically disassembling a component to clean the dust from inside. You are not installing anything new.
Just like you tore apart your GPU, put it back in the same way. But still, I can understand if there is hesitation on your part, you can always consult with a professional, watch youtube tutorials, or better yet, read this guide.
It is great that you care for your components and you want to keep them clean. After all, the benefits of a clean GPU can’t be ignored.
You get better performance, a cool card will give you headroom for future overclocking, and you may have increased its lifespan unknowingly.
In short, there are no negatives, and if this is done right. You are more likely to succeed, followed by gaining confidence in handling PC components.