Adobe’s Premiere Pro is arguably the most versatile editing tool available in the industry right now (sorry, Mac users). It allows you to edit your videos with the most excruciating of details and the finest of controls.
And with its ever-growing list of features, it’s become the primary software many people use to edit VR or 360° content.
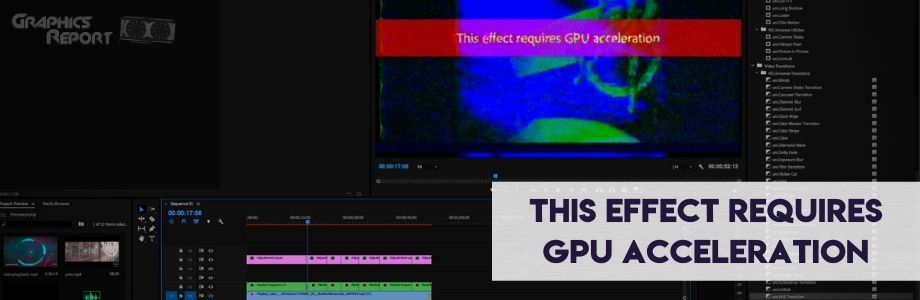
However, it’s not all roses and daisies out here because the software also often runs into weird bugs and issues, and possibly the most noted one out of all those is the infamous red banner on your screen saying, “This effect requires GPU acceleration.”
This happens when you are editing a video that requires your graphic card’s power to process everything thoroughly, but some obstacles can come in your way to prevent that from happening.
It can be as essential as enabling a toggle or as devastating as accepting the fact that you need to upgrade your graphics card.
How To Solve “This effect Requires GPU Acceleration” In Windows 10.
There are several different culprits behind this error; all of them can be solved, so need not worry. Let’s look at all the possible solutions to fixing the GPU acceleration error in Adobe Premiere Pro in Windows 10.
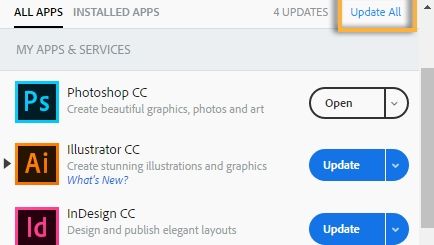
1- Install The Latest Updates.
It goes without saying, yet I am here saying it, please keep your stuff updated; this goes for everything from applications to even your drivers.
There is a reason developers release updates to their software regularly so that their app, in this case, Adobe Premiere Pro, strays away from any potential bugs or issues that can spoil your editing session.
Updating to the latest version of PP can potentially solve any previous problems or known issues that you were facing. Adobe updates its entire suite of applications pretty regularly to fix bugs and add new features, so make sure you’re running on the latest version of their editing software.
2- Make Sure That The Application Is Installed Correctly.
There is a good chance your installation of Premiere got corrupted, or maybe a fragment of the application is missing from the file directory. This is why you can also get the “Adobe Premiere couldn’t find any valid editing modes” message.
It can happen for various reasons, but to fix this, you have to re-download and then install it again, making sure that the application is installed 100 percent properly. Restart your PC and see if that did the job.
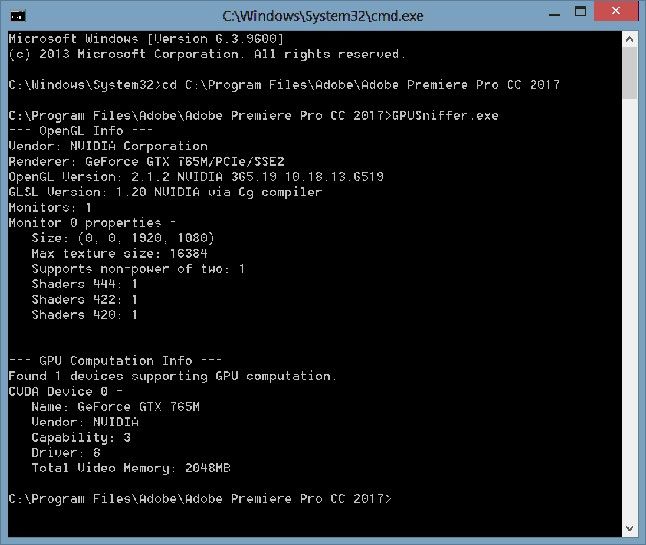
3- Run “GPUSniffer.exe.”
Adobe Premiere utilizes your CPU to run almost all the processes while your graphics card is given minimal work and acts instead as an assistant to your processor.
But that’s not the case all the time; often, the software needs to use your video card to lessen the burden from your processor or hand over tasks that are better suited for a graphics card to perform.
GPU acceleration is the name of this feature where applications call in your video card to work alongside your SoC. Still, sometimes PP fails even to recognize or detect your graphics card.
And here is where GPUSniffer.exe comes into its place to ‘sniff’ (hehe) out your video card from the system so that Premiere can use it for GPU accelerated tasks. To do this, close editing software Pro and,
- Navigate over to where Premiere Pro is installed.
- Search for “GPUSniffer” and locate the executable.
- Double click on it and let the command prompt windows do its thing.
- After the window automatically closes, open Premiere again.
If you are still seeing that red banner and it is not detecting your card, you need to upgrade your graphics drivers to the latest version (or roll back to a previous one if there are known compatibility issues in the new update).
Other than this, it will be good practice to disable your integrated graphics that are built into your CPU via either the BIOS or Device Manager.
This should do the trick and allow PP to pick up your graphics card and finally remove that frustrating red banner from your project. However, if it doesn’t and you are still where you started, then you need to follow along and try the steps mentioned above beforehand, too.
4- Check Your Antivirus.
You may have an antivirus installed on your computer to protect it from all sorts of evil and bad things, but do you know that the antivirus itself could be an evil dark lord?! Calm down. I’m just exaggerating.
Even though antiviruses have been known to cause issues and interfere with your system, they generally do a good job of guarding it, until you run into problems using other applications because of your antivirus.
Try disabling certain features or restrictions in your antivirus to allow for Premiere to run correctly. If the problem still pertains, then try disabling the antivirus entirely so that it does not interfere with the editing software at all.
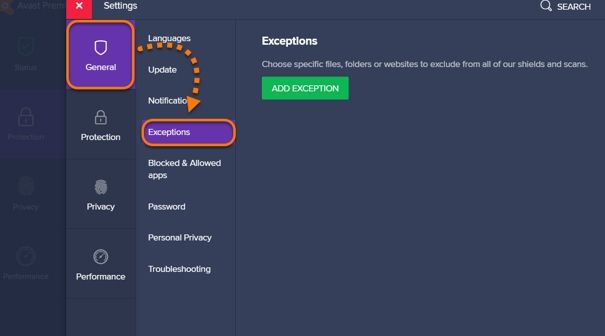
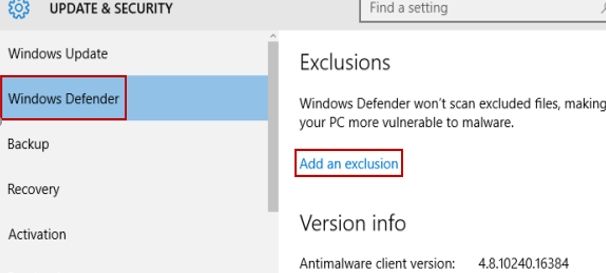
And don’t worry, disabling your antivirus won’t instantly hack your system; Windows Defender will do a good enough job of protecting your PC by itself. Still, I will suggest you also should white-list Adobe Premiere Pro from Windows Defender to stop any interference with the app.
5- Enable GPU Previewing [Mercury Engine]
Premiere Pro uses your processor to render and playback the video in real-time while you are editing it; this limits you to weaker software-based effects as serious or graphics-intensive effects will not work because your CPU has to do all the work here. However, PP can leverage your GPU to preview the video in real-time and essentially reduce the load of your CPU or enable more demanding effects to be pliable in real-time.
There are three different real-time rendering options available in Premiere, Software Only, CUDA, and OpenCL. You will notice that both CUDA and OpenCL are GPU accelerated options while the Software Only option exclusively utilizes your CPU to render everything making your graphics card sit duck. You want to select either of the GPU accelerated options based on your video card so you can be enabled to preview the most demanding effects in real-time.
- Go to File (located on the top tab of your project).
- Select Project Settings and then General.
- Here, under the “renderer” setting, you will see a drop-down menu.
- Select “Mercury Playback Engine GPU Accelerated (CUDA)” for Nvidia cards and “Mercury Playback Engine GPU Accelerated (OpenCL)” for AMD cards.
- Save your newly applied settings, and now you should be utilizing your video card for rendering alongside your processor.

How To Optimize Performance In Adobe Premiere Pro CC.
There are many ways to get more out of your system, case in point, for editing in Premiere. PP is known for being extremely demanding compared to other editing utilities, and for a good reason.
It offers the most multifaceted set of tools available in editing software (for Windows at least) and happens to include very comfortable integration with Adobe’s Creative Cloud.
So, let’s look at the ways you can make your experience using the editing software even better.
1- GPU Acceleration.
As we discussed above, you can push in your video card’s power to be wielded by the editing software for assisting in the preview or real-time rendering of your project.
This is called the way it is as you are “accelerating” your video card and harnessing its capabilities. You need at least a 1GB graphics card from either AMD or Nvidia to use this feature, the more recent, the better.
Nvidia is generally preferred in productivity based systems as Nvidia cards have “CUDA Cores” inside them that help massively in real-time rendering in editing software.
However, lately, AMD cards have been popping up everywhere because of their incredible price to performance ratio and the value proposition to budget-conscious consumers.
Refer to section 5 for more details on how to enable this feature in your project.
2- Memory Allocation.
RAM is certainly not a downloadable resource from the internet. You have a limited amount of it inside your system, so it’s good practice to allocate that RAM effectively between all your applications across your entire computer.
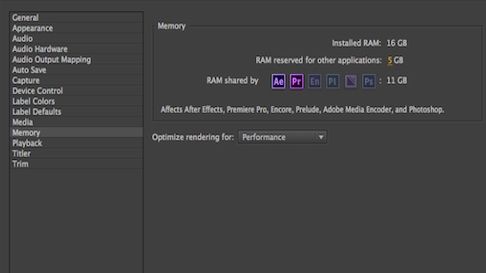
Adobe Premiere allows you to set a maximum amount of memory that it can use, shared with other Adobe apps like After Effects and Photoshop, etc.
You should set this number to as high as you can while reserving some RAM for other processes running on your computer, your browser, and maybe a media player, for example.
The general rule is to allocate about 75% of your RAM to Adobe Apps and leave the rest for your computer, but this is highly subjective and based upon your preferences and amount of memory present, of course.
To change the allocated memory, select File, navigate to the Memory section, and adjust accordingly.
3- Optimizing Your System.
This is more of a starting step than anything else, as you should make sure that your system is capable of running Premiere Pro smoothly. Most importantly, it would help if you had a fast and capable CPU; I’d recommend at least a 6-core SoC.
Pair that with a graphics card capable of pushing all the frames it can; generally, the more expensive the video card, the better, and try to go with at least 4GB of VRAM (1 is the bare minimum).
Lastly, it would be best to have about 16GB of DDR4 memory for a smooth experience, even though you CAN work with 8. If you can squeeze in 32 gigs, you will be in a real sweet spot.
Keep in mind that SSDs are miles faster than mechanical hard drivers, so opt for one of those; there are many different types of SSDs, so do a little research before deciding.
Cooling is also something you need to give a thought to as you wouldn’t want your editing rig to heat up and start thermal throttling in the middle of an editing session. And like everything I mentioned above, the more you spend on it, the better parts you’ll get.
4- Point Media Cache To A Different Drive From OS.
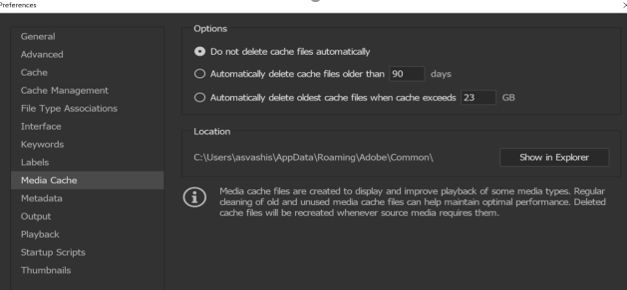
Everyone knows that you install your OS on the fastest drive in your computer, but what about the rest of the stuff? Where does that go? See, Premiere creates cache files of all media that you import in so that it can access those files in a snap.
This can build up many files over time, and it’s going to become unhealthy for those cached files to be stored up inside your drive as it’s going to take up space and slow down your computer.
You want to leave your SSD (or wherever your OS is installed) to be utterly void of any other files so that your SSD can provide the best read/write speeds to your OS and keep everything real snappy. Media Cache files are going to slow that down.
To change this, go to File, navigate over to Media Cache, and set your Media Cache storage location to any drive other than where you have installed your OS to allow for optimal performance.
Final Verdict:
Professionals prefer and use Adobe’s suite of applications daily because they provide the best features available anywhere and allow creators to tailor the perfect video according to their taste. Sometimes, you hit small snags like a graphics acceleration error, but it is relatively easy to resolve this issue and contour your editing.
To get the most out of Adobe Premiere, you will need to follow a couple of straightforward guidelines that will ensure the best experience for you and allow you to make even better videos with the tools that are already readily available in the palm of your hands.
- Graphics card not detected
- Force gpu rendering
- What is AMD’s fidelity fx super-resolution
- Gpu coil whine
- Gpu connector
- What is Nvidia reflex
- What does ti stand for in gpu
Frequently Asked Questions (FAQs)
1- How do I fix ‘this effect requires GPU acceleration’?
You need to make sure that the editing software is actually detecting your video card and then enable GPU Accelerated real-time preview rendering in the Premiere settings.
2- What does ‘this effect requires GPU acceleration mean’?
Your CPU is sometimes just not enough to handle all the processes that PP is throwing at it, so it needs your graphics card’s assistance, and that’s why you get this specific error.
3- How do I turn on this feature?
Go to File, then General, and under the “Video rendering and playback” settings, change the renderer to “Mercury Playback Engine GPU Accelerated (CUDA)” for Nvidia cards and “Mercury Playback Engine GPU Accelerated (OpenCL)” for AMD cards.